How to Connect to Stevens-Net on iOS (iPhone/iPad) Devices
Step-by-step instructions on how to connect to Stevens-Net, the Wi-Fi network on campus for iOS devices.
Before you start
- For best Wi-Fi connectivity, we recommend that you install the latest version of iOS.
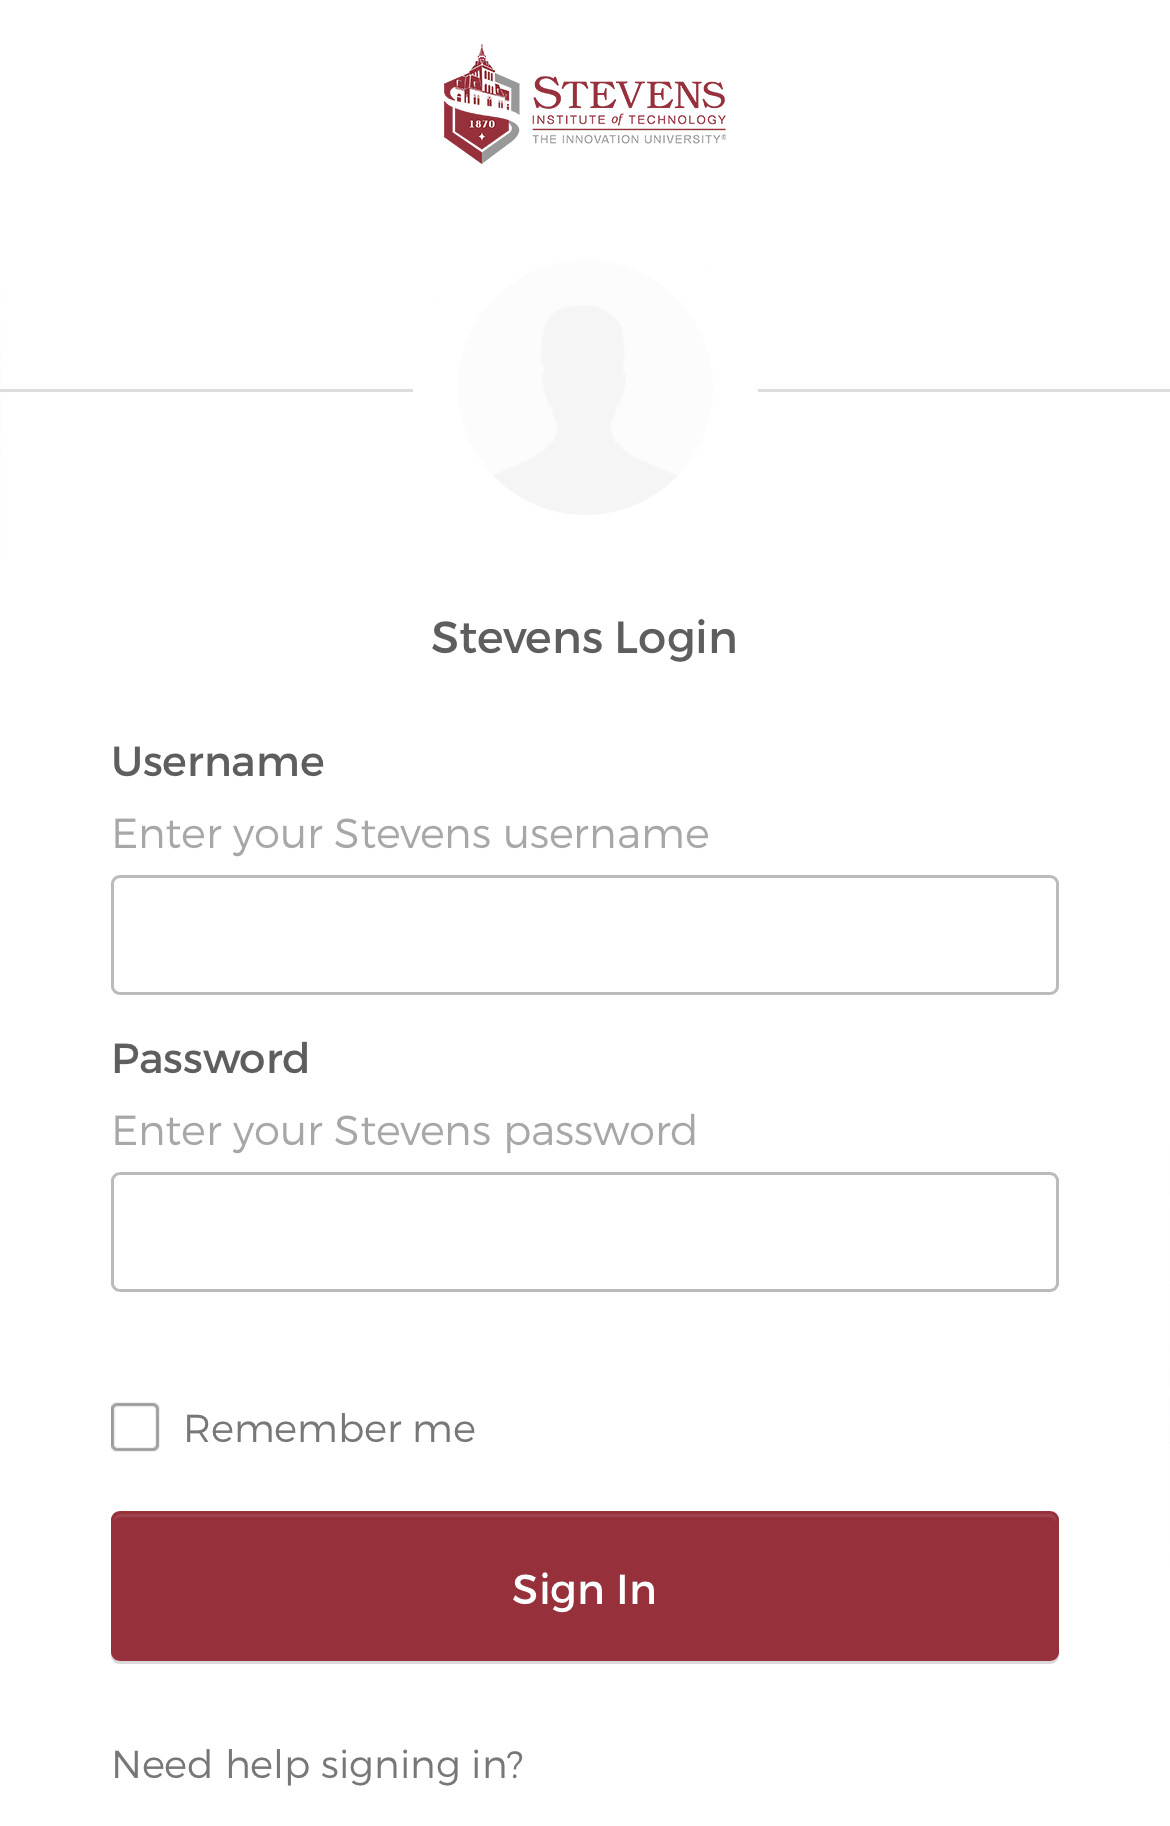
Step 1: Open a Web browser (preferably Safari), type in https://stevens.edu/connect Select Sign In

Step 2: On the Single Sign-On Authentication prompt please enter your Stevens username & password.
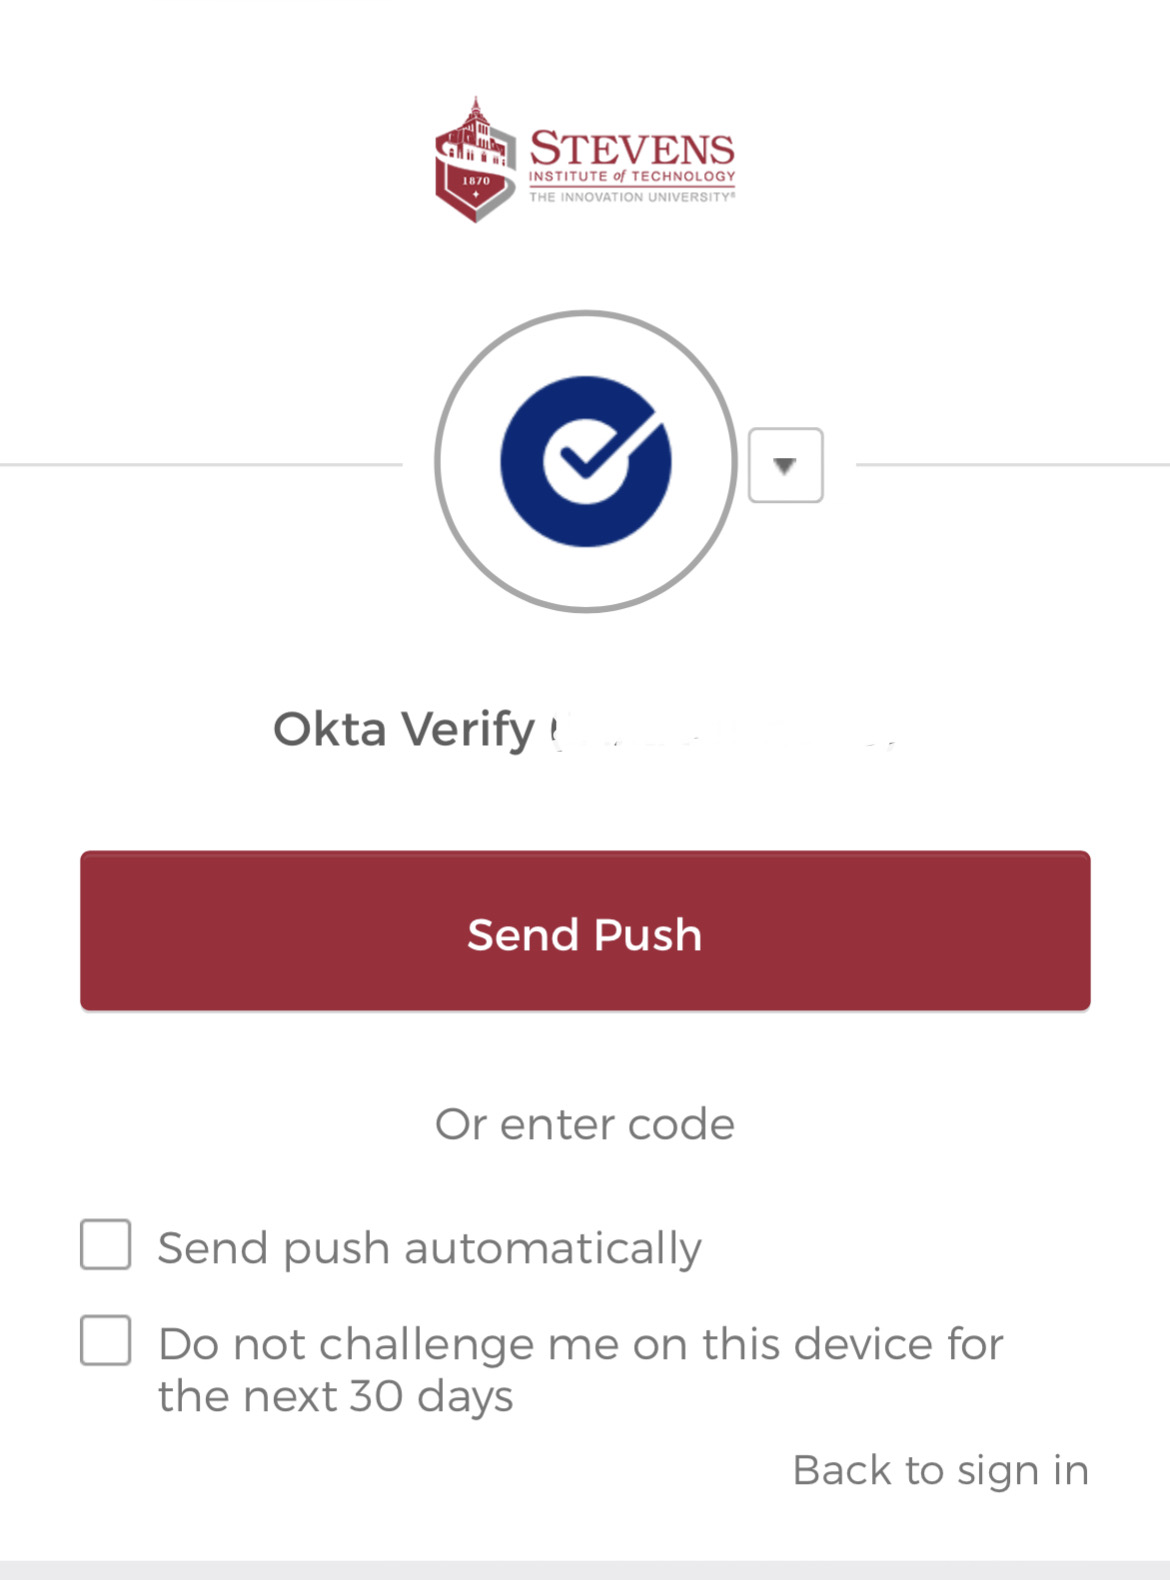
Step 3: Follow Okta prompts to complete login.
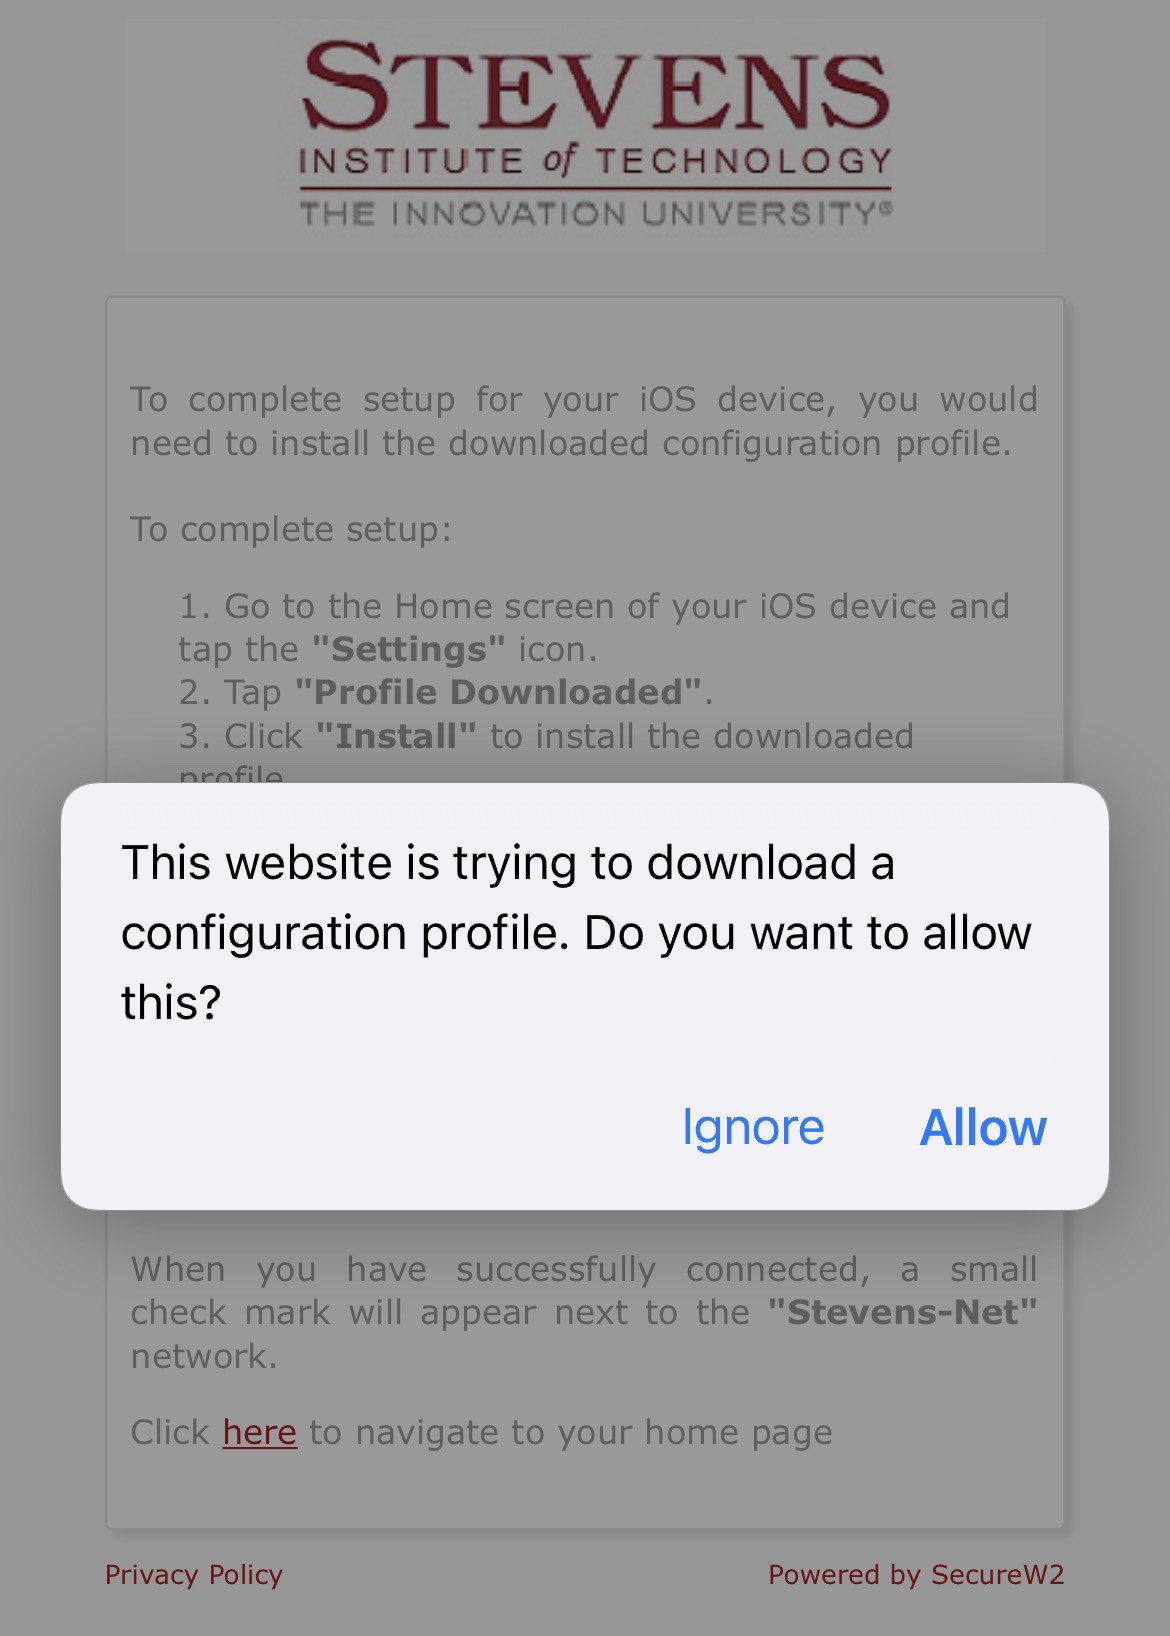
Step 4: Download the Stevens-Net certificate. Select Install.
- If you are using the latest version of iOS then you will be prompted to download the profile.
- Select Allow and Close all the pop-ups
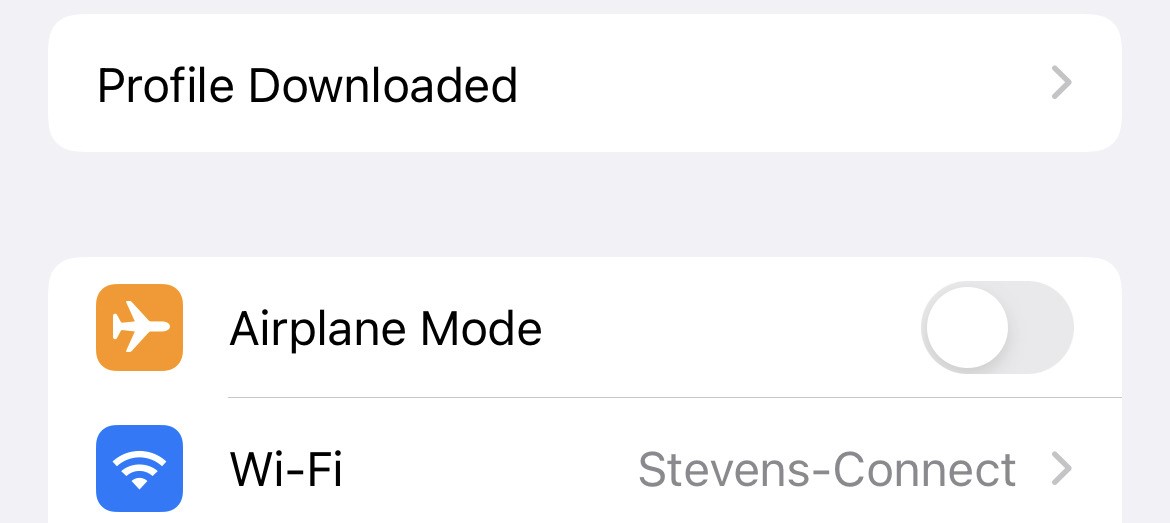
Step 5: To install the profile you downloaded go to the Setting App.
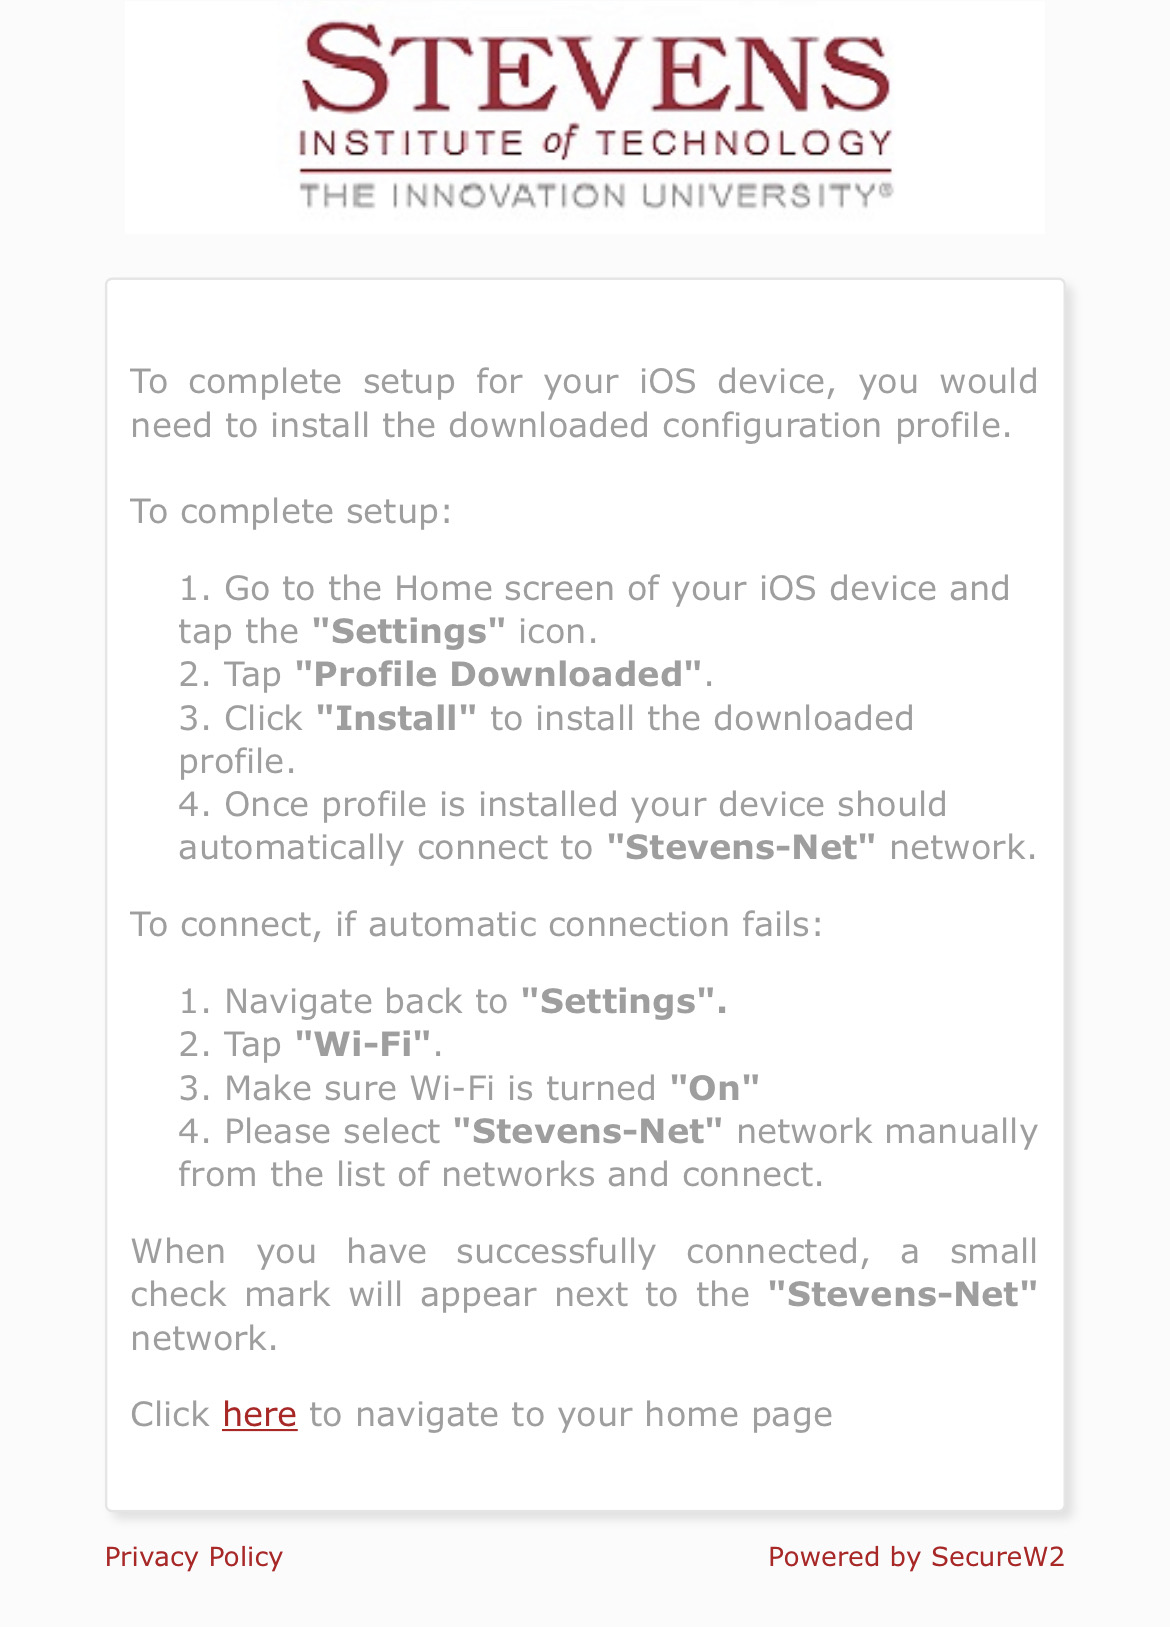
Step 6: Click Profile Downloaded
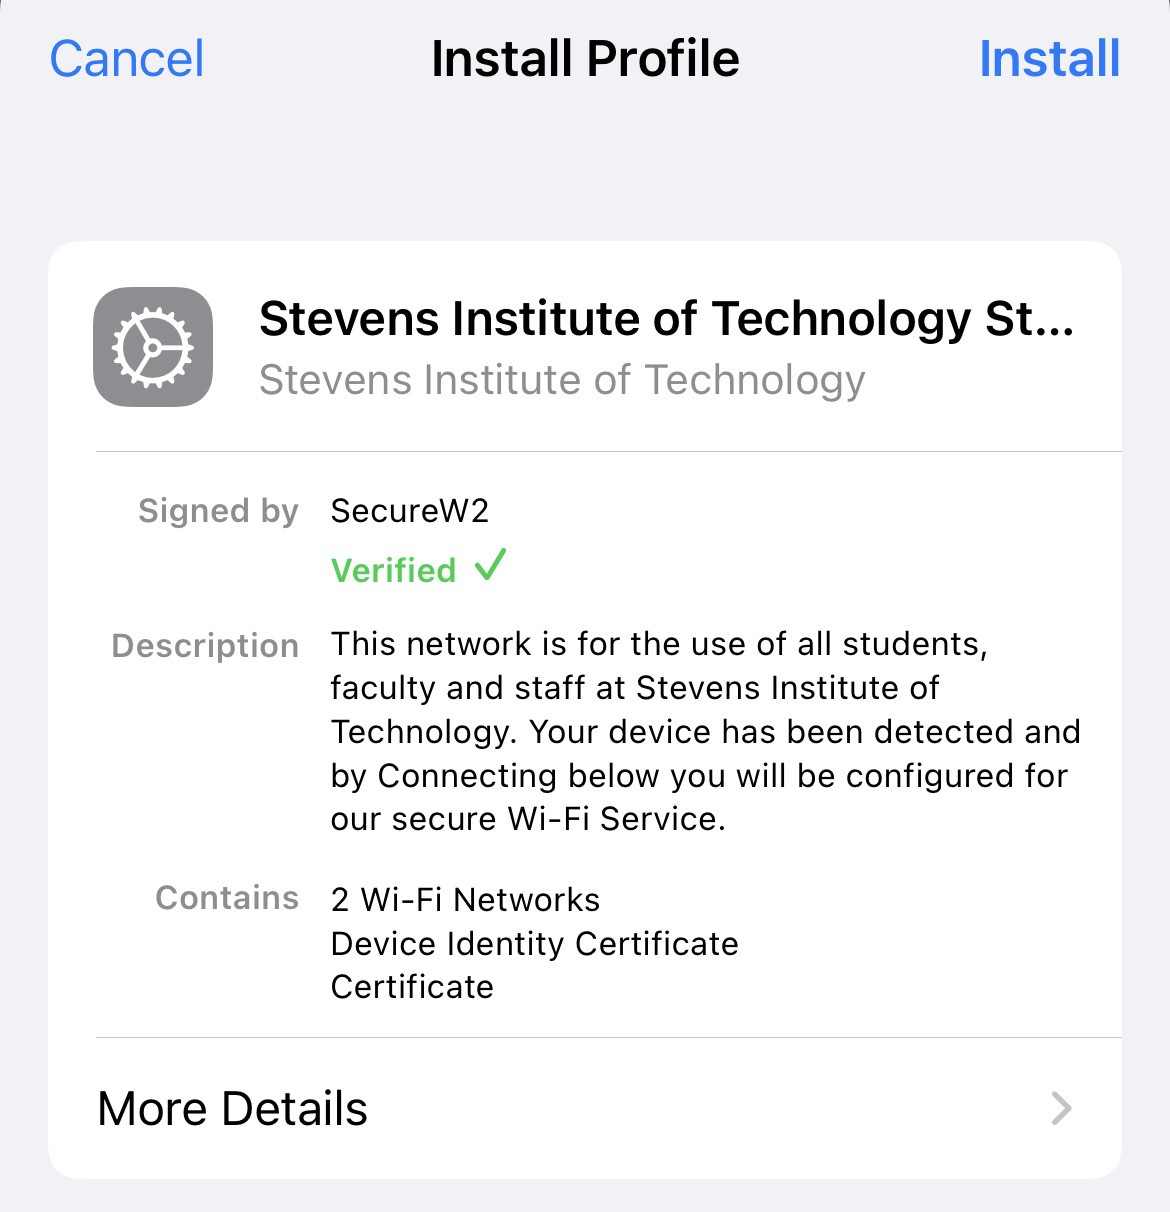
Step 7: Install the Profile.
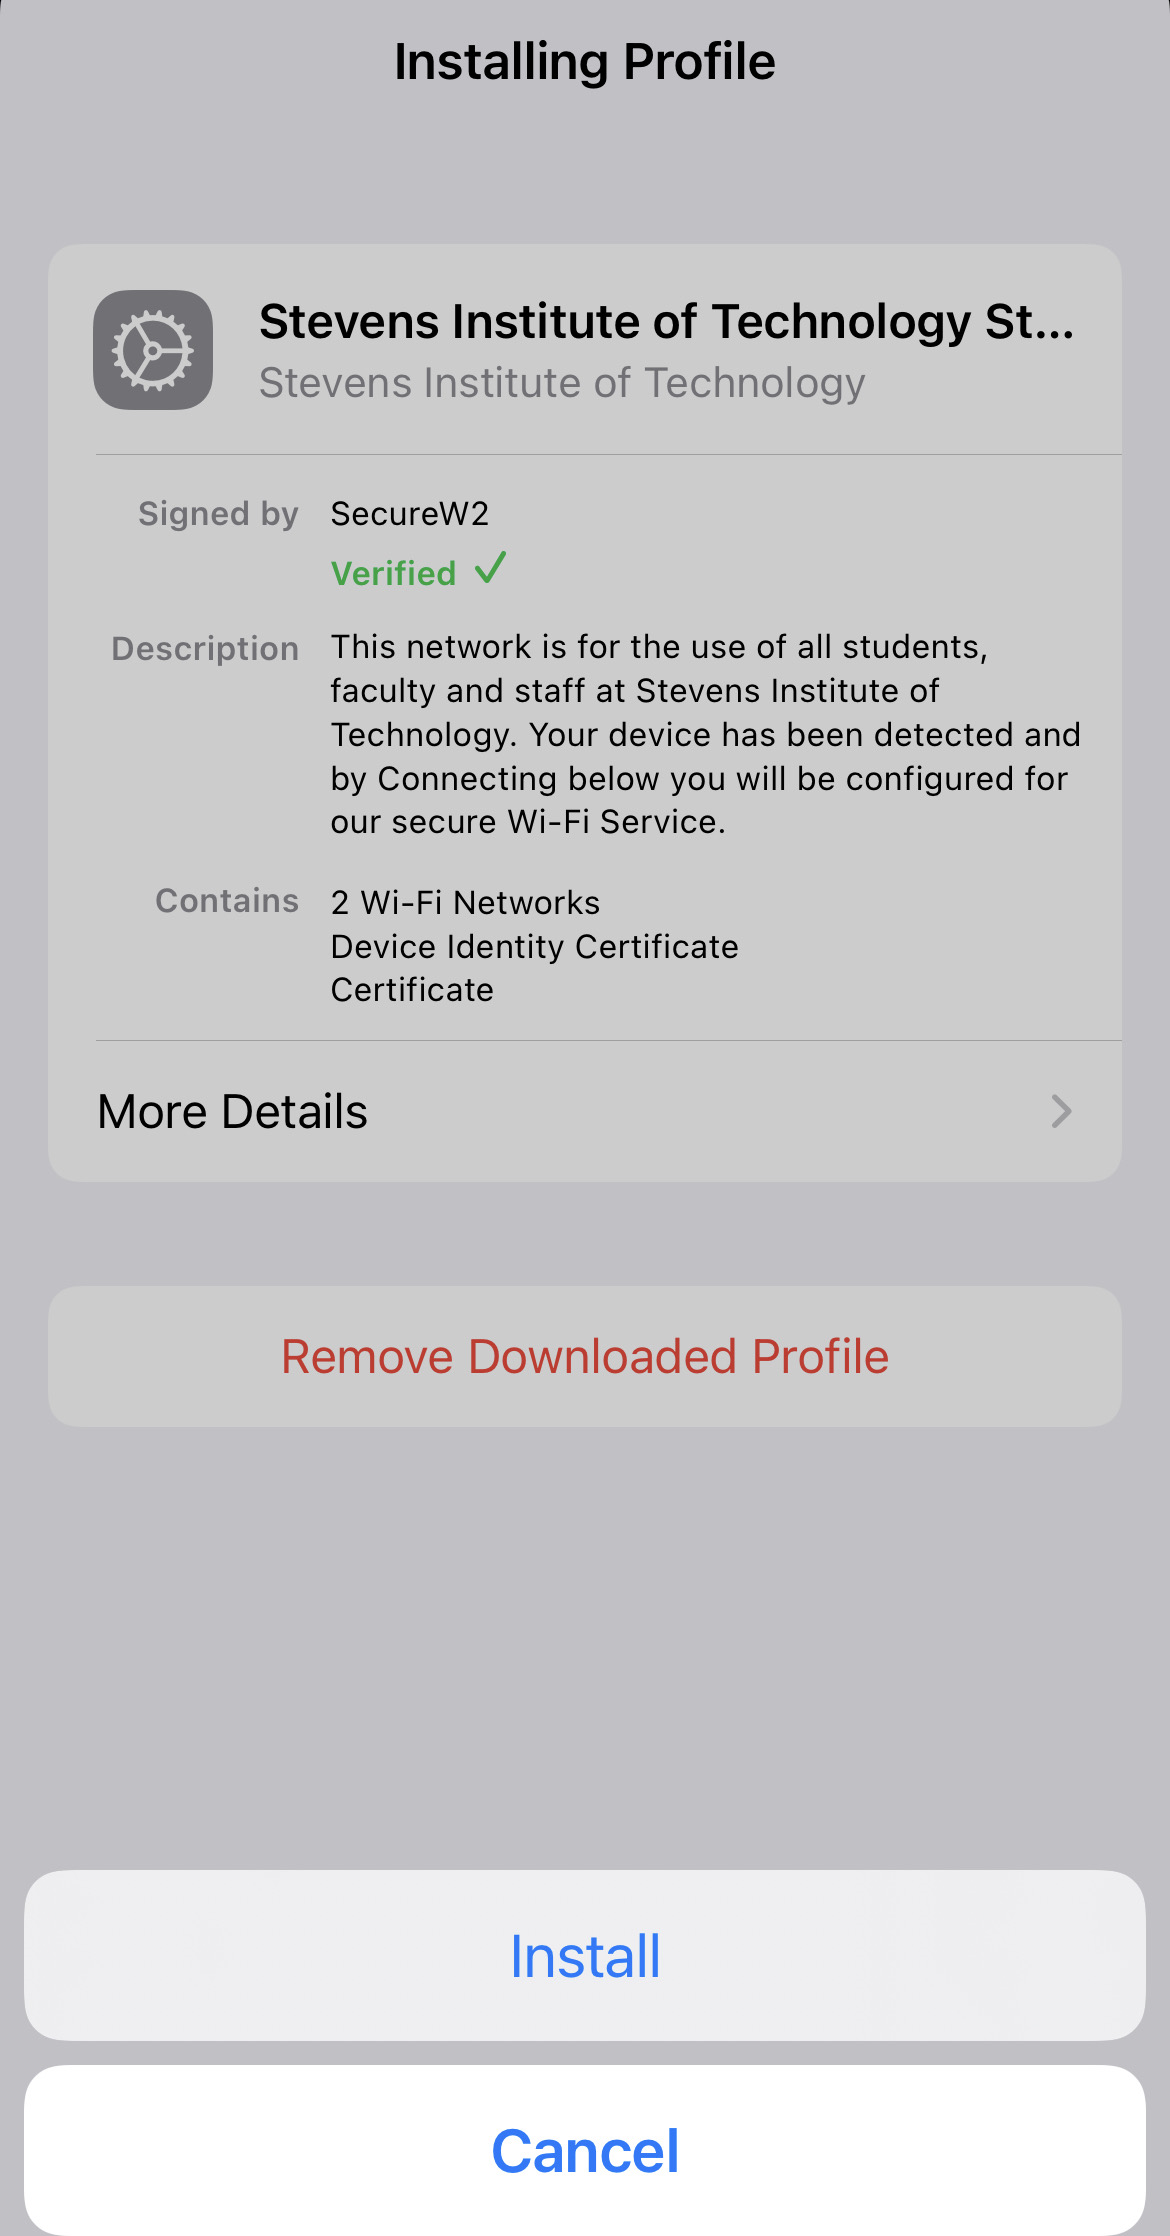
Step 8: A Root Certificate Installation Warning will display. Select Install
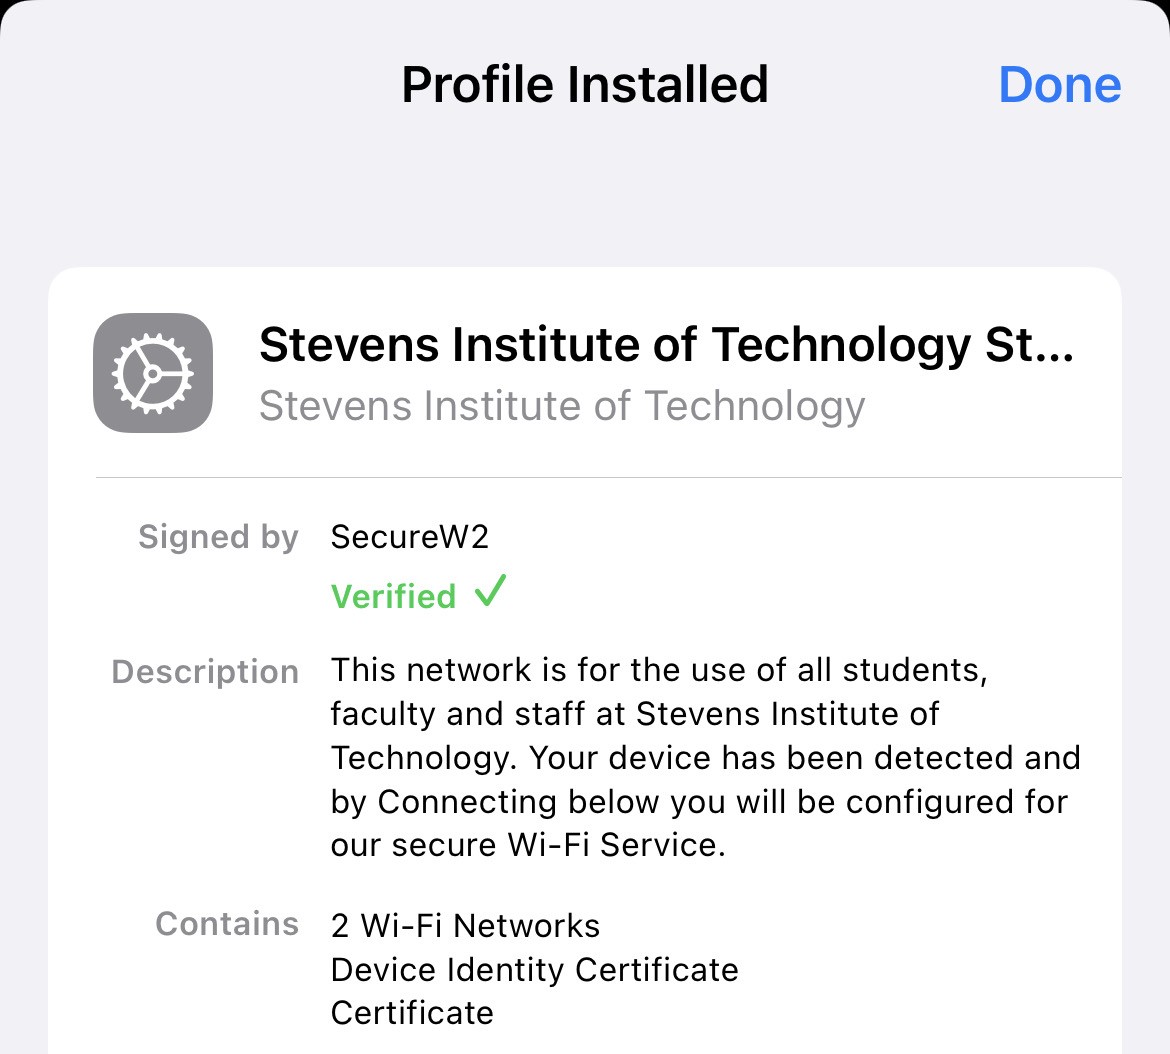
Step 9: Select Done
Step 10: After the certificate is installed, join the Stevens-Net network.
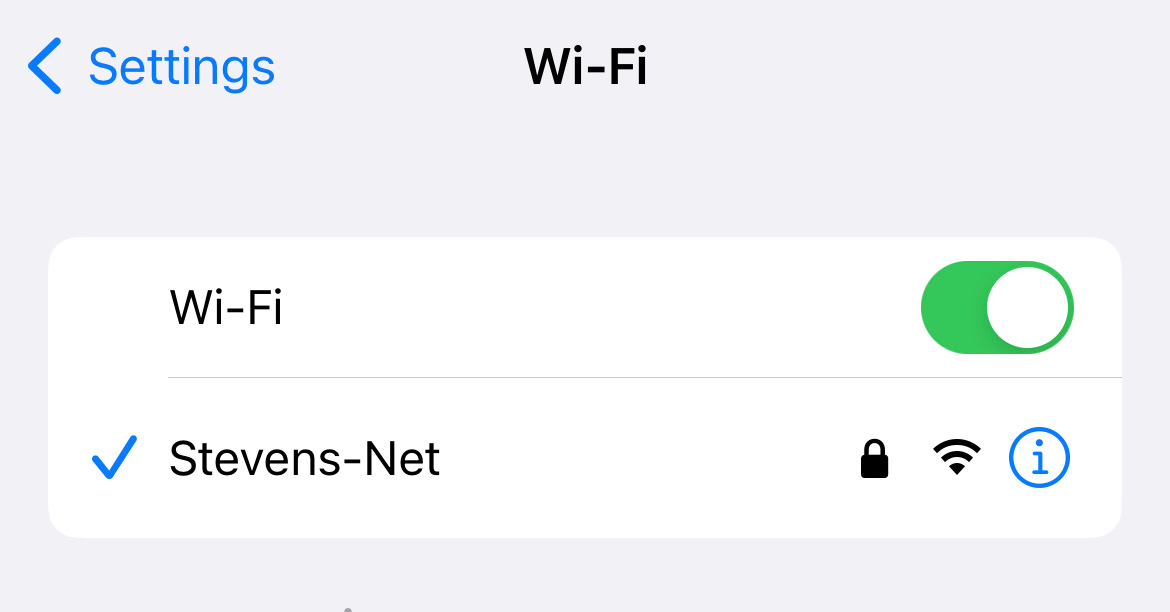
You are now connected to Stevens-Net.
Experiencing an issue or need additional support? Contact our OneIT Team by