Troubleshooting Wi-Fi Connection to Stevens-Net on Windows Devices
The following step-by-step instructions will help you troubleshoot connections issues with the Stevens-Net WiFi that are caused by out-of-sync certificate.
Before you start
- Ensure that your computer is configured to automatically Join Stevens-Net.
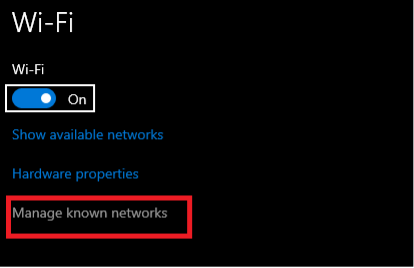
Step 1: From the Start menu, open Settings. Then navigate to Network & Internet > Wi-Fi.
Step 2: Click Manage known networks.
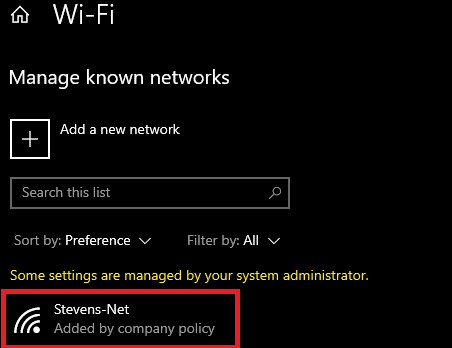
Step 3: In the list of known Wi-Fi networks, you should see Stevens-Net, with the note Added by company policy. Please take note as to whether or not you see this network and note, as it will help in further troubleshooting.
Remove and Re-Sync the Network Certificate
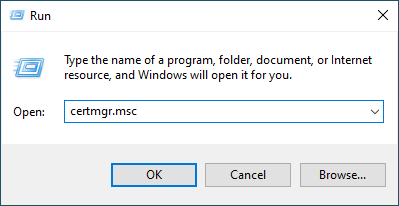
Step 1: Right-click the Windows icon (Start menu button) in your taskbar.
Step 2: Click Run.
Step 3: Enter certmgr.msc
Step 4: Expand Personal on the left sidebar, then click Certificates.
Step 5: Look for the certificate issued to Your Name and issued by Stevens Institute of Technology Device Intermediate CA (it may also be issued by SecureW2).
Step 6: Right-click on that certificate, then select Delete to remove it from your machine.

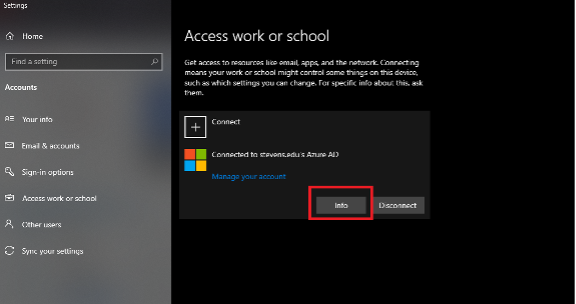
Step 7: From the Start menu, open Settings. Then, go to Accounts > Access Work or School.
Step 8: Click on Connected to stevens.edu's Azure AD, then click Info. If you do not see this, click the item that contains "MDM" in the name, and then click Info.
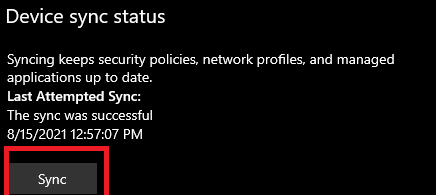
Step 9: Scroll down, and under Device sync status click the Sync button. Wait until you see "The sync was successful" and the current time is displayed.
Step 10: Once the sync completes, close Settings and try connecting to the Stevens-Net Wi-Fi network.
Experiencing an issue or need additional support? Contact our OneIT Team by