Edit an Academic Plan in Workday
An Academic Plan is a guide that helps a student plan their academic path to satisfy all their academic requirements and complete their Program(s) of Study.
Note: Your Academic Plan is not meant to be used as a degree audit tool. Please refer to your Academic Progress tab to view your Academic Requirements.
Edit an Academic Plan in Workday
Step 1: Select your profile image on the Workday homepage, then select View Profile.
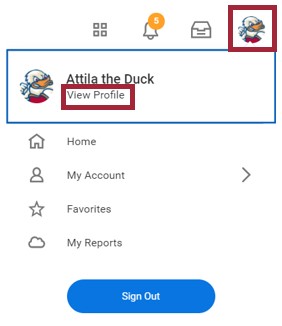
Note: If you have an active campus job, make sure you have selected your student profile before continuing to step 2.
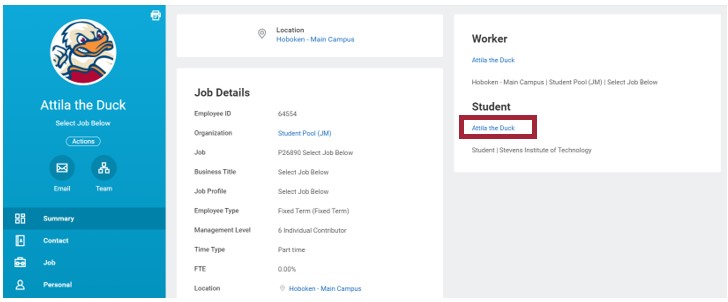
In the box housing the links to your Worker and Student profiles, select your name under your student profile.
Step 2: Select Academics.
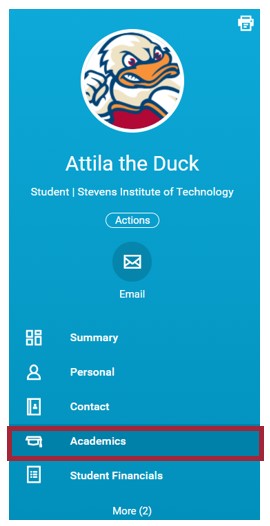
Step 3: From Overview tab, navigate to Plan tab view, then select Update Plan.

Step 4: When you have made your desired edits to the Academic Plan, select OK.
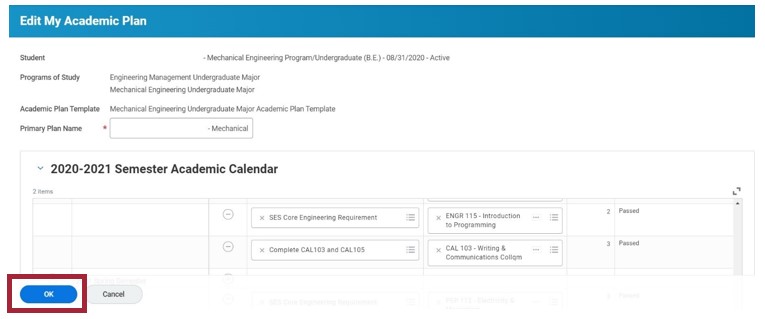
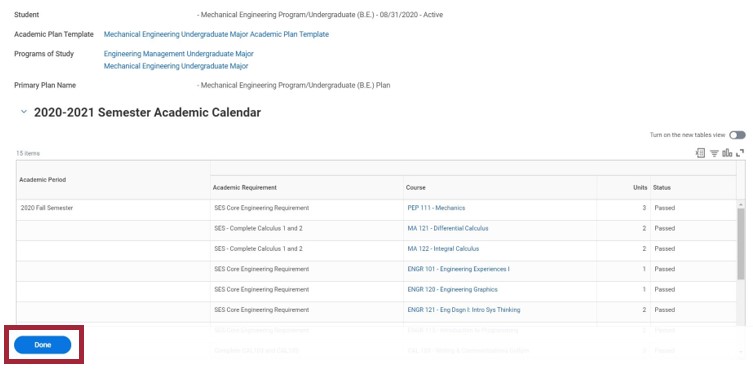
Step 5: The following page shows the edited Primary Academic Plan. Click Done when finished.
Adding Academic Requirements and Courses
Step 6: To add a course to an Academic Period, select the plus (+) icon and enter or search for the Academic Requirement by selecting the bullet list icon.
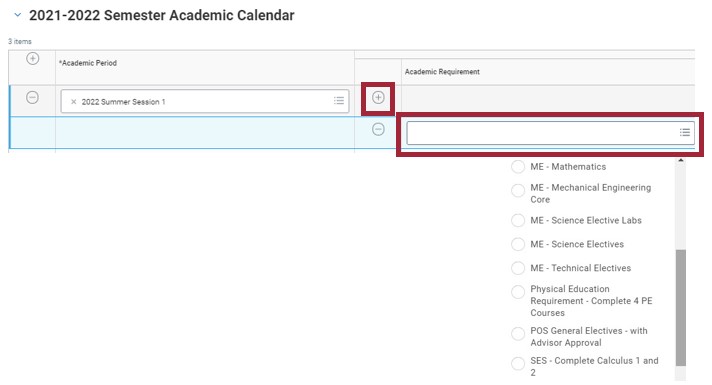
Step 7: Enter or search for Course Name using the bullet list icon. The Course field will usually populate with a list of courses that apply to the selected Academic Requirement. In some instances, Workday will display “Error: Too many results. Refine search to narrow results.” in the Course list. When this occurs, enter a subject abbreviation to receive a filtered list of courses.
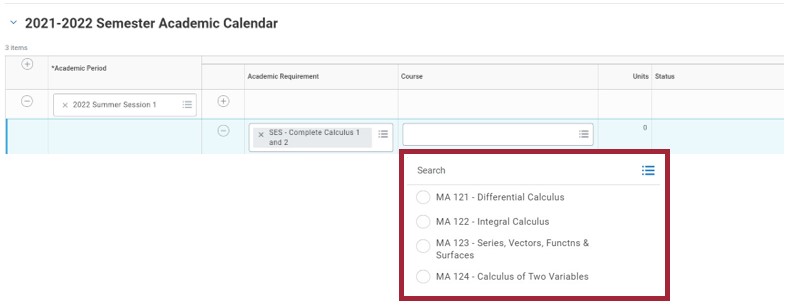
Step 8: Once Academic Period, Academic Requirement, and Course are selected, the Units and Status fields will automatically update based on the entered information.

Rearranging Academic Plan Courses
If there are courses generated into your Academic Plan that you plan to take in a different Academic Period, please follow the next steps.
Step 9: Select the minus (-) icon of the course you wish to move from one Academic Period to another.
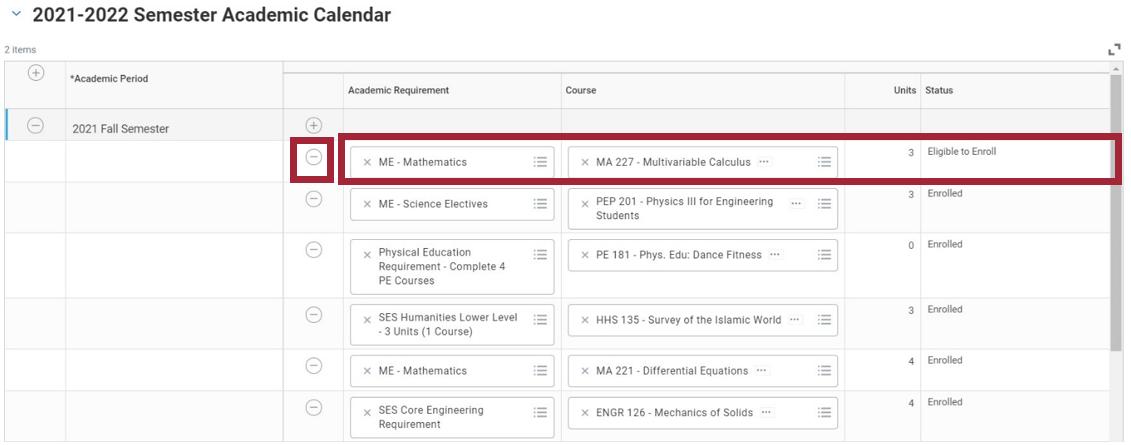
Step 10: Select a new Academic Period for the course and add it by selecting the Academic Requirement, then Course name.

Adding/Removing Semester Academic Periods
Step 11: To expand or hide specific academic periods, select the arrow next to the Semester Academic Calendar. To add additional academic periods, select the plus (+) icon then enter or search for Academic Period in the drop-down menu by using the bullet list icon.
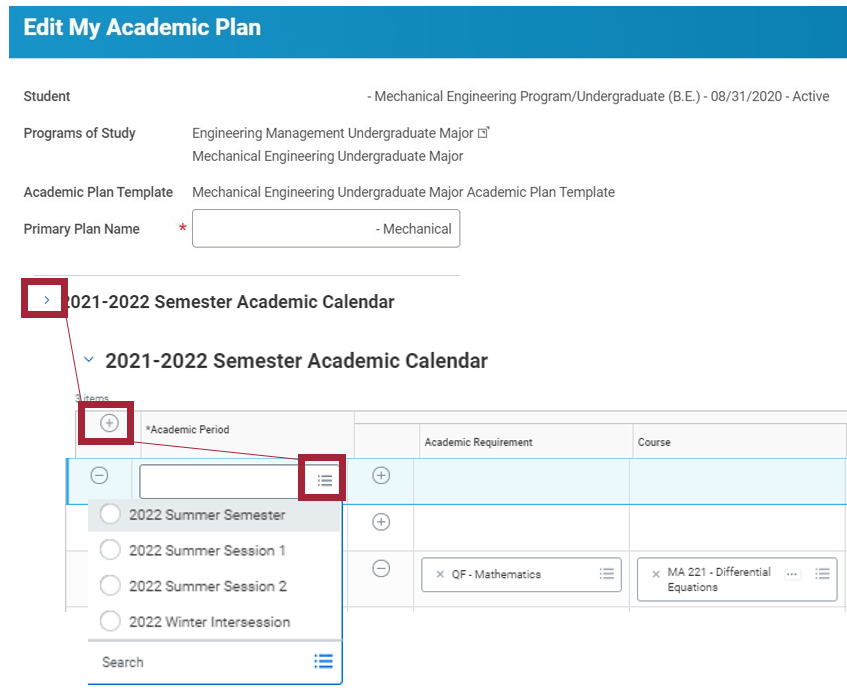
Step 12: To remove an academic period from the auto-generated Academic Calendar years, select the minus (-) icon located next to the Academic Period.

Course Enrollment Status Definitions
Passed
You have completed this course and received a passing grade.
Did Not Enroll
You did not enroll in this course in the assigned semester.
Enrolled
You are enrolled in this course for the current or upcoming semester.
Eligible to Enroll
You have not registered for this course, but you meet all the eligibility requirements to take the course.
Eligible to Enroll – Planned
You have not registered for this course, but you are taking courses that will allow you to enroll in this course in a future semester.
Not Eligible
You are currently not eligible, nor will you be eligible based on your Academic Plan.
Experiencing an issue or need additional support? Contact our OneIT Team by