Assign and Change Final Grades in Workday
This guide will walk a user through assigning and changing final grades in Workday.
In addition to Workday, Final Grades can be entered in Canvas. If grades need to be corrected once submitted via Canvas, those corrections must be completed in Workday.
Please refer to this user guide to learn more about entering grades on Canvas: Submit Grades Through Canvas.
Assign Final Grades
Quick Search: Assign Student Grade for Student Course Section
Quick Search: Assign Student Grade for Student Course Section
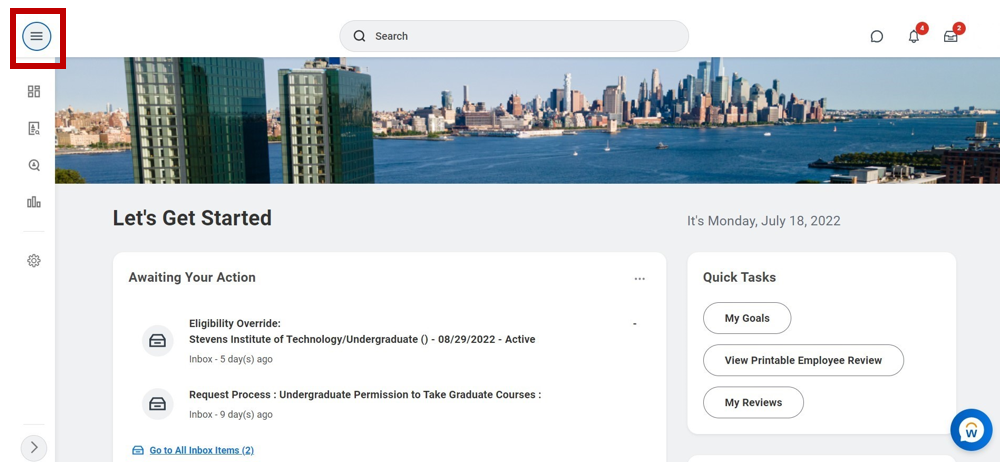
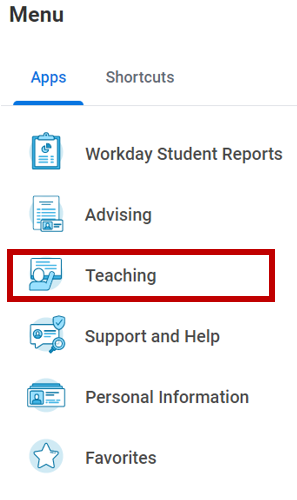
Step 1: Open the Global Navigation menu (the  icon) on the left side of the Workday Today homepage. Select Teaching in the Apps section on the Workday homepage.
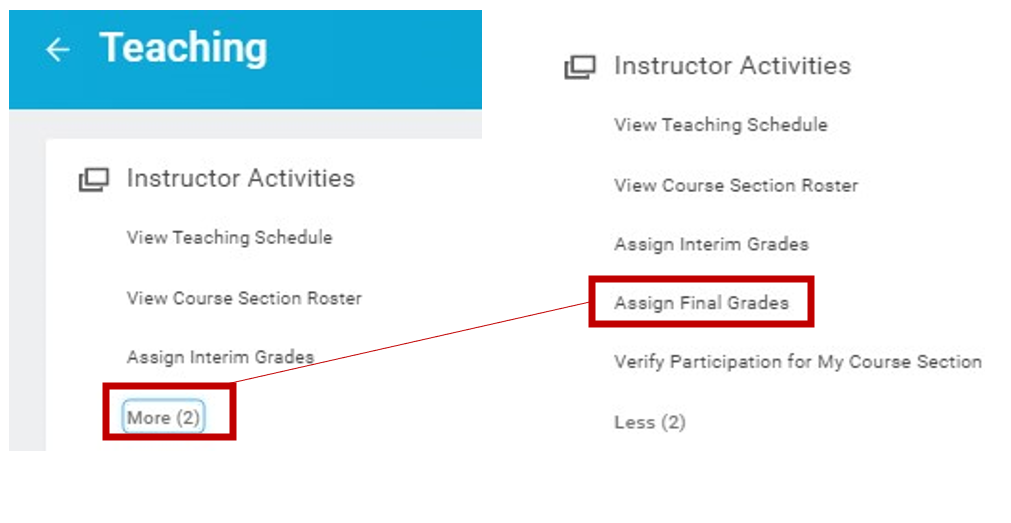
Step 2: Select More to expand list – Select Assign Final Grades
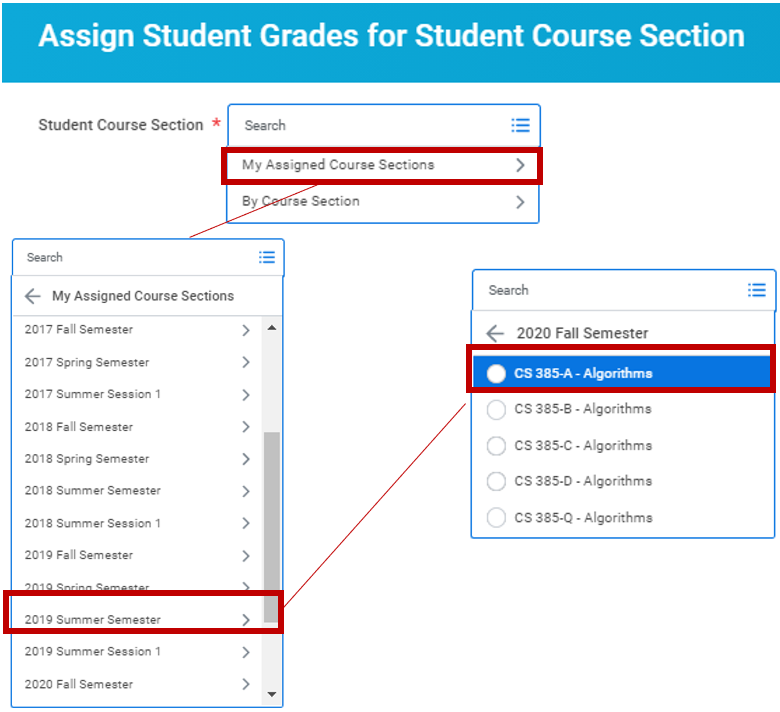
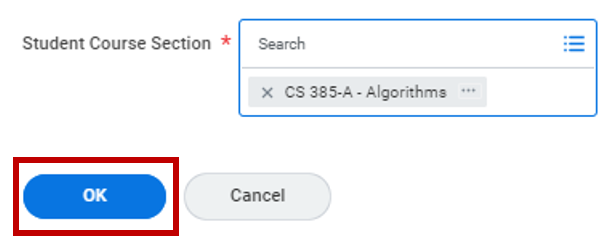
Step 3: Select My Assigned Course Section – Select the Academic Period and Course Section you want to assign grades.
Step 4: Select OK
Step 5: Select a Final Grade from the dropdown menu in each student’s row.
Note: Select the Student column header to sort students alphabetically.
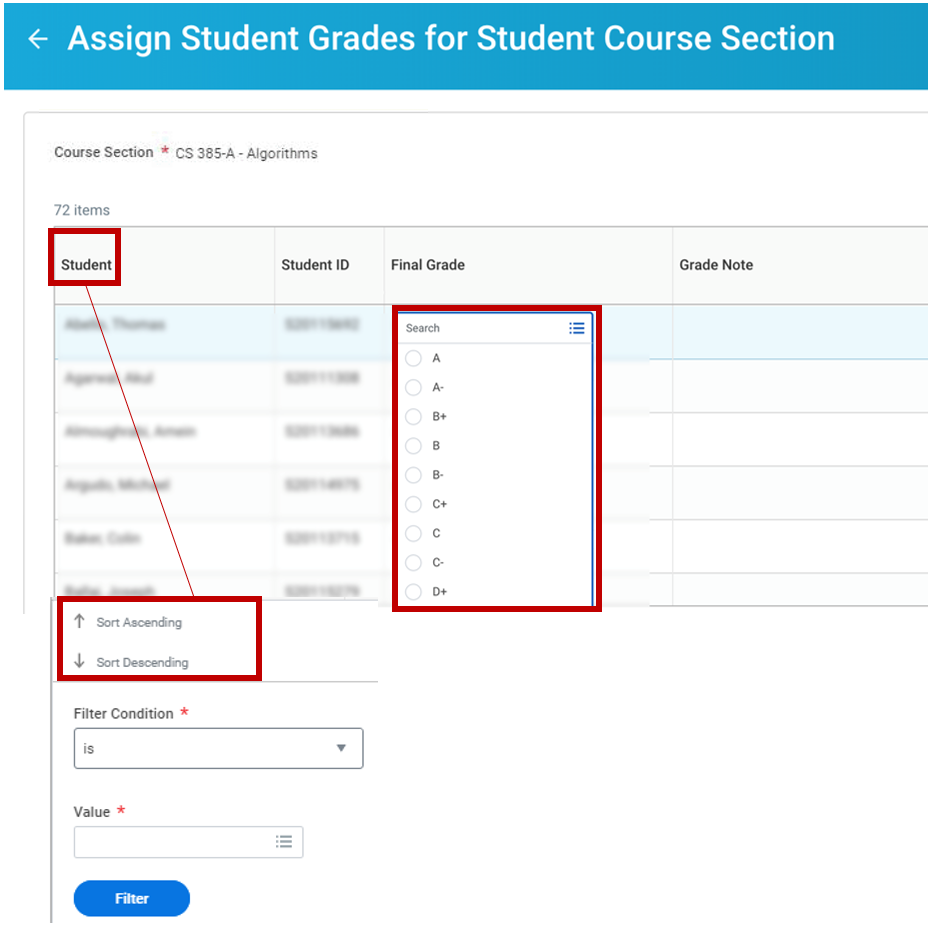
Step 6: Select Submit or Save For Later
Note: If you select Save For Later you will not receive a reminder to complete remaining students’ final grades.

Step 7: Review student grades – Select Confirm – Select OK
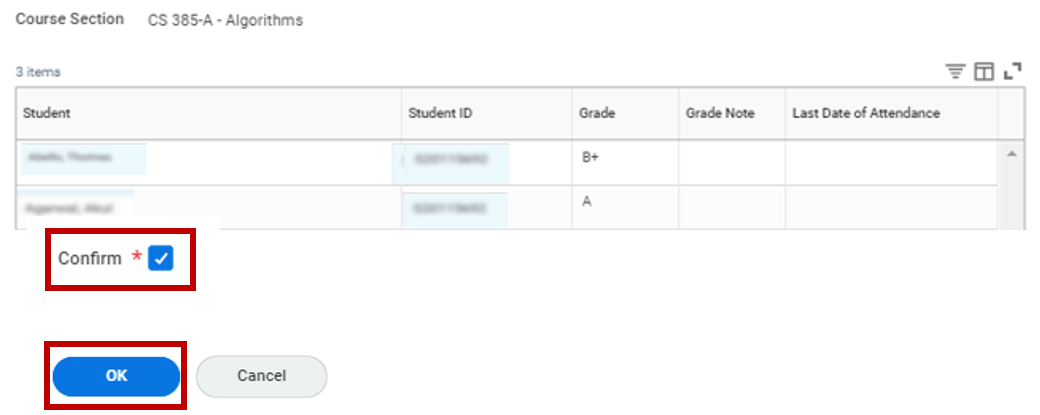
Step 8: Select Done

Change Final Grades
To change students’ final grades, Follow Steps 1-4 mentioned above by logging into Workday, selecting the teaching icon under Applications, in the Instructor Activities tab select “Assign Student Grades for Student Course Section”, select “My Assigned Course Sections”, enter academic period, and course section.
Note: Changing student grades can only be processed in Workday while the grading window is still open. Once grades are entered on Canvas, any further grade changes must be submitted through Workday.
To apply column preferences, select the column icon located on the top-right hand corner. Select Apply when finished.
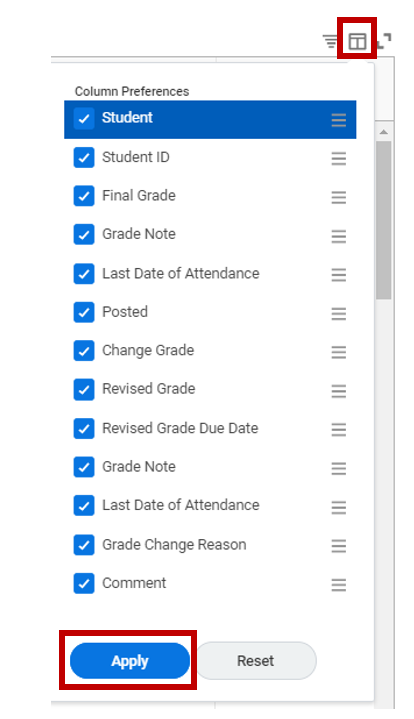
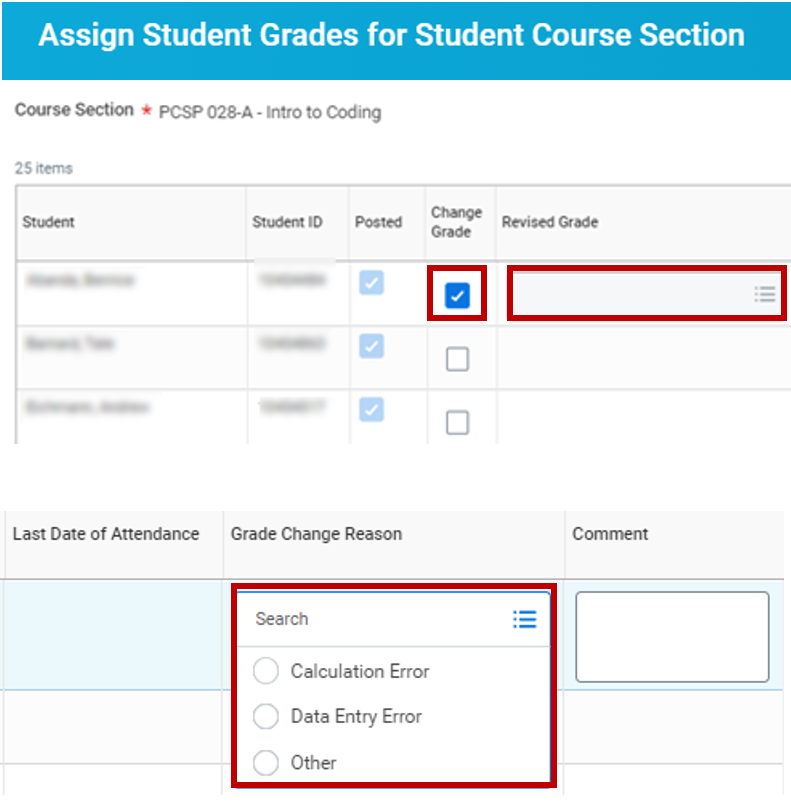
Step 5: Next to each student’s name you wish to assign a different grade:
- Select the Change Grade checkbox
- Select new grade in the Revised Grade field
- Select Grade Change Reason
Step 6: Select Submit or Save For Later
Note: If you select Save for Later you will not receive a reminder to complete remaining students’ final grades

Step 7: Review student’s revised grades – Select Confirm

Step 8: Select OK

Step 9: Select Done

Experiencing an issue or need additional support? Contact our OneIT Team by