New Student Onboarding in Workday
This guide will walk a student through completing the New Student Onboarding tasks in Workday.
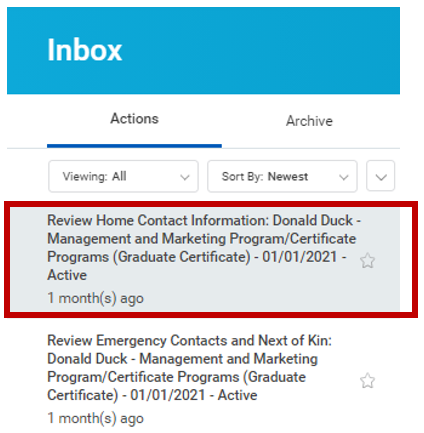
Step 1: From your Workday homepage, select the Inbox Icon

Step 2: From your inbox – Select Review Home Contact Information
Step 3: Review your current Home Contact Information. If information is accurate, skip step 3-4 and continue onboarding on step 5. If you need to make any changes, follow the next step. Select Edit
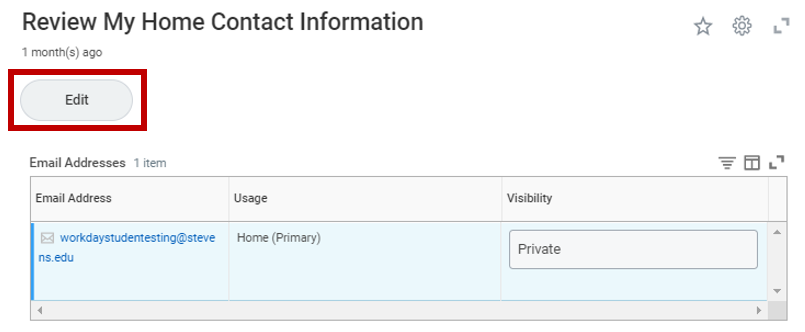
Step 4: Select – X icon to delete current information. Select – Pencil icon to edit current information. Select – Add to add additional information. Use the Search Address box to search for your address. Once selected, the address will prep-populate in the remaining address fields. Once finished, select Submit

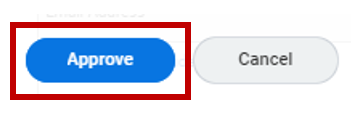
Step 5: Added information will now be reflected on your student profile - Select Approve
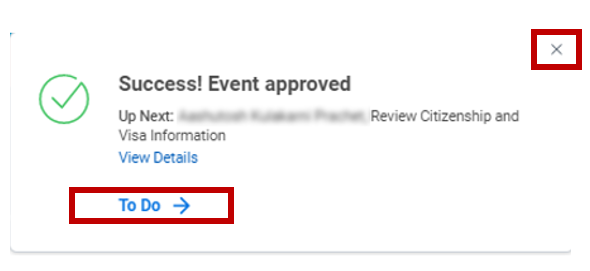
Step 6: To view additional information, select View Details. To continue onboarding Select X icon.
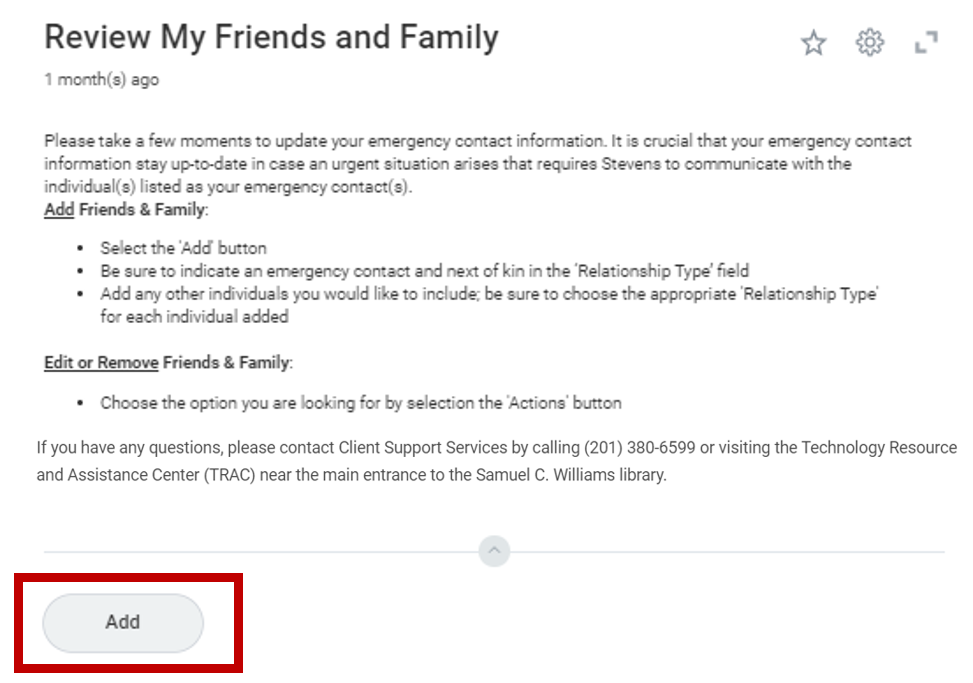
Step 7: Review My Friends and Family instructions and information. To enter Friends and Family information. Select Add
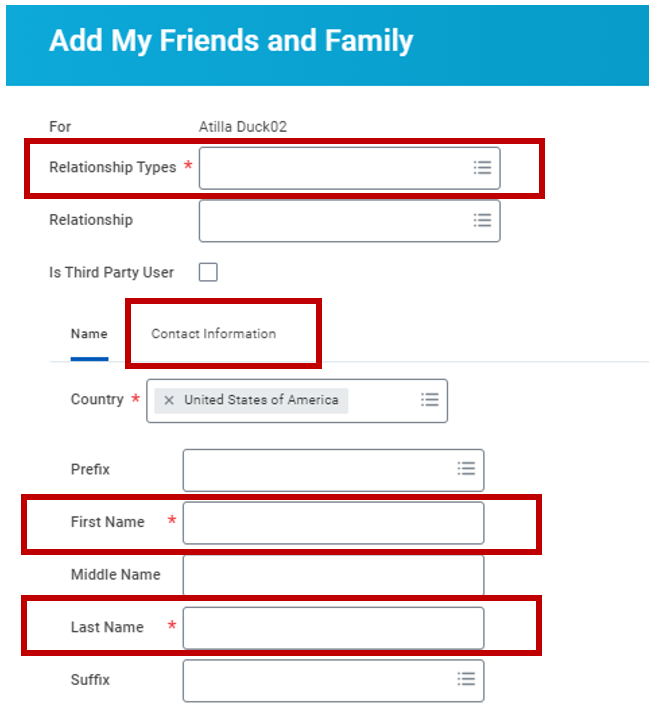
Step 8: Enter information in fields marked with an asterisk. Select Contact Information Tab
Step 9: Select Relationship Type and enter additional information by selecting Add. Select Done

Step 10: Select OK

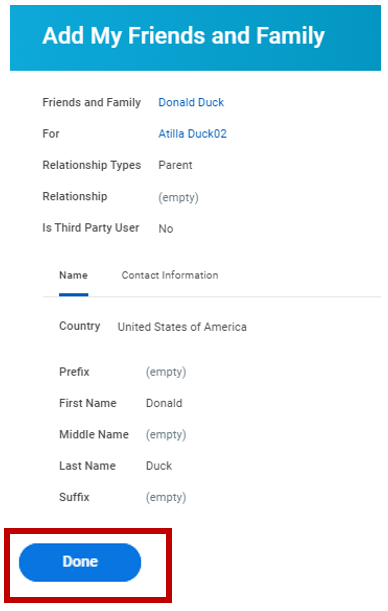
Step 11: Review added Friends and Family information. Select Done
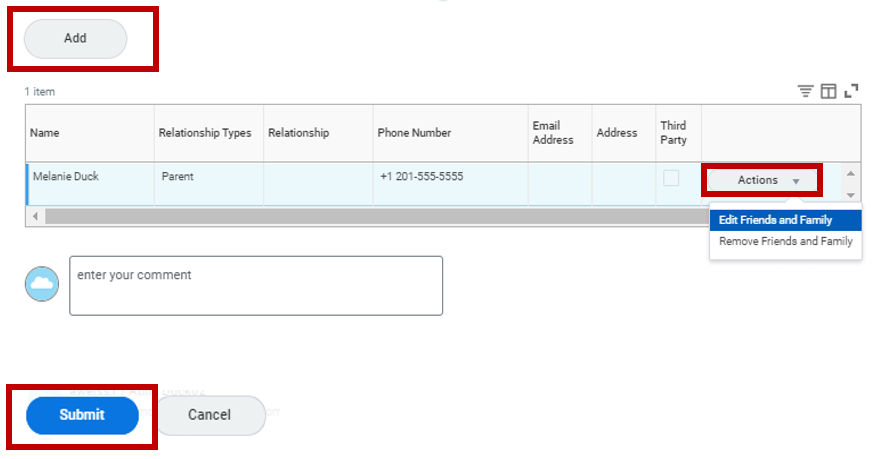
Step 12: Review Friends and Family Contact Information. To edit or remove contacts, select Actions. Select Submit
Step 13: Select Done

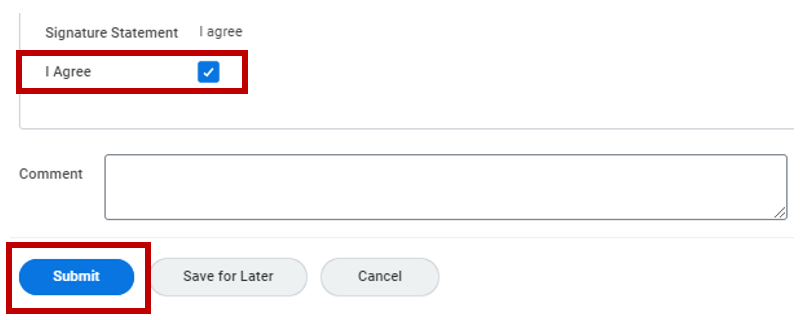
Step 14: Read all Financial Acknowledgement Agreements. Select I Agree box – Select Submit
Step 15: To view additional information, select View Details. To continue onboarding Select X icon.
Note: If you are an international student, please continue to the next step.
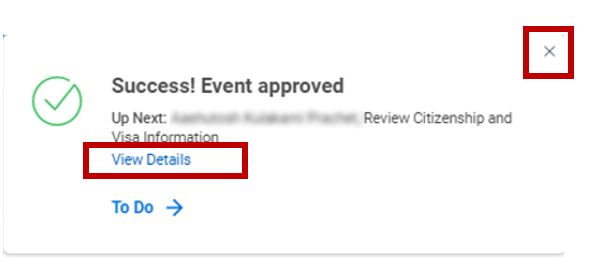
Step 16: Review instructions and verify citizenship and visa information is up to date. If no changes are needed, select Submit.

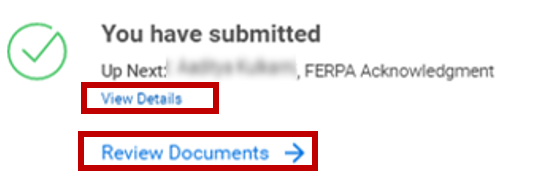
Step 17: For additional information, select View Details. To continue onboarding, select Review Documents.
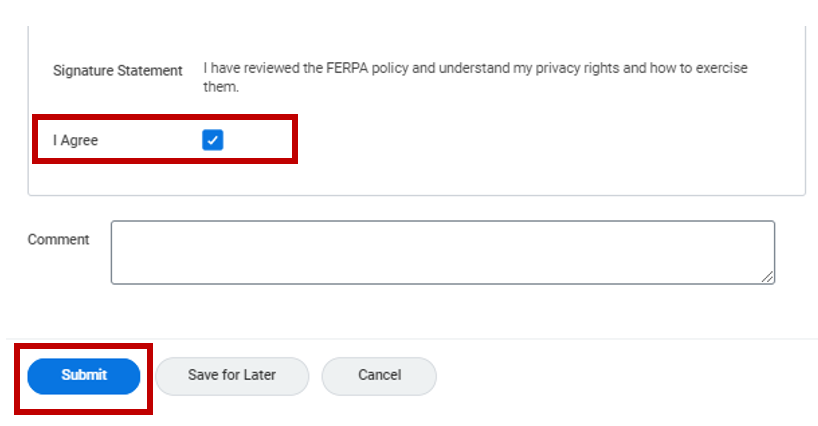
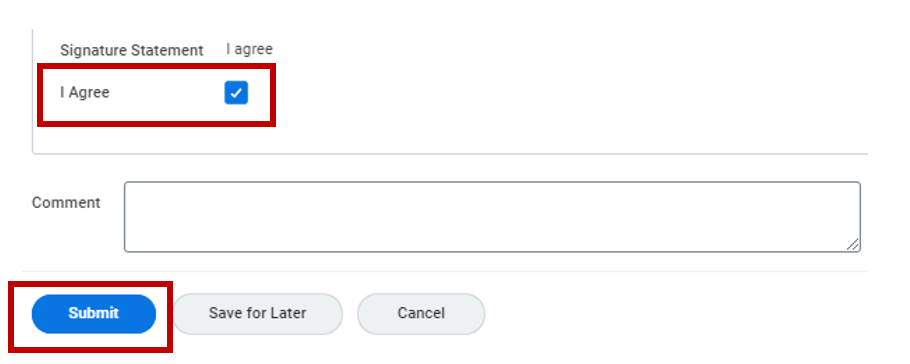
Step 18: Read FERPA Privacy Rights Policy – Select I Agree box – Select Submit
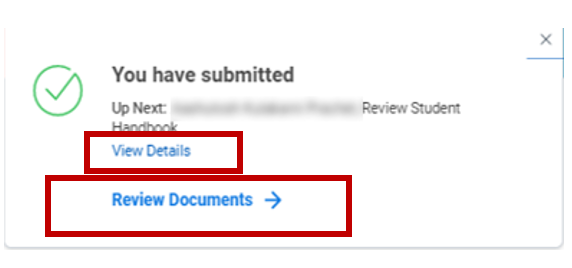
Step 19: For additional information, select View Details. To continue onboarding, select Review Documents.
Step 20: View the Student Handbook by selecting the hyperlink in the instructions field. Select I Agree box and Submit to continue onboarding.
Step 21: For additional information, select View Details. Onboarding is complete.

Experiencing an issue or need additional support? Contact our OneIT Team by