Request Course Section Prerequisite Override in Workday
This article walks a student through requesting a Course Section Prerequisite Override in Workday.
Note: Submitting and having this request approved in Workday does not automatically enroll a student into the requested course section - an approved request only provides a student with permission to enroll in an approved course section. To enroll in a course section after a successfully approved request, please refer to the following article: Register from a Course Section in Workday
To view your currently enrolled course sections, please refer to the View My Courses article.
Quick Search: Request Course Section Prerequisite Override
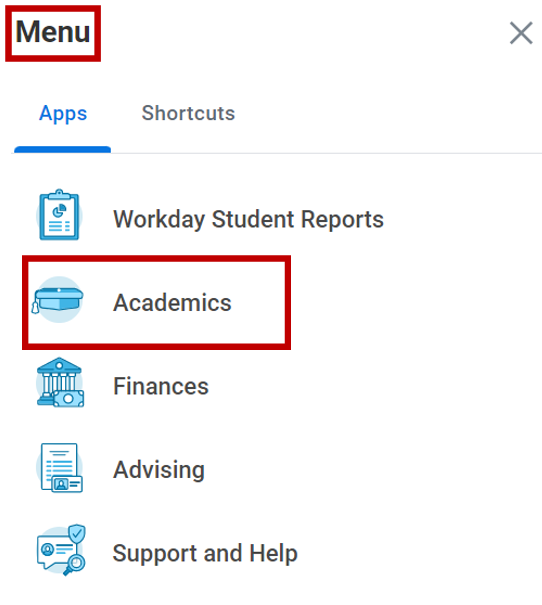
Step 1: From your Workday homepage, select Menu on the top left corner and choose the Academics worklet in Apps tab
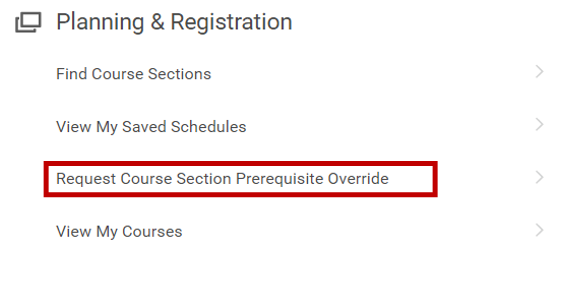
Step 2: Select Request Course Section Prerequisite Override located in the Planning & Registration section.
Note: Select More to expand Planning & Registration section.
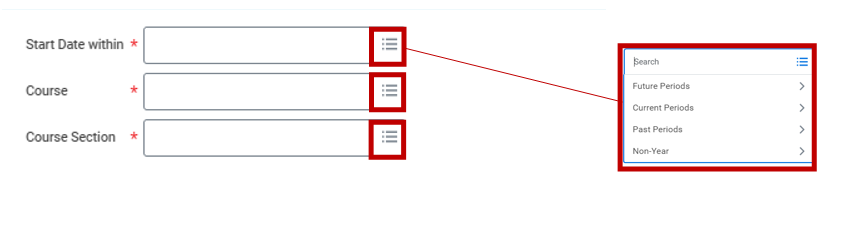
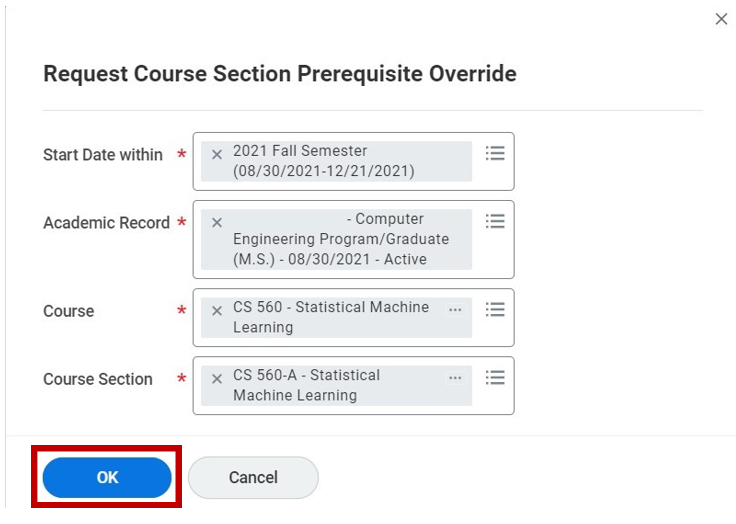
Step 3a: Select Start Date within – Choose Period and then Semester
Select Course – Type in Course Subject and Course Number
Select Course Section – Dropdown will present application Course Sections
Note: Select the fields for the course you want to take without having completed the prerequisite(s). If a field does not produce drop down options, enter a course or course section ID. If a field still returns “No Items” after submitting your entry, there is either no prerequisite(s) or the course and course section is unavailable in the selected academic period.
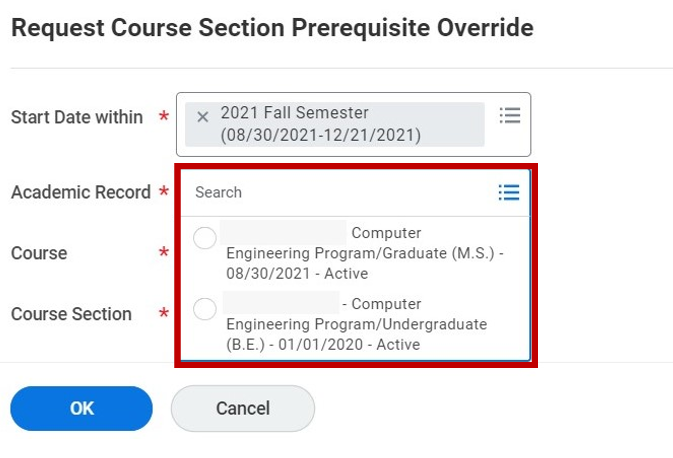
Step 3b: Select the Active Academic Record where the override will be applied. This only applies to students with multiple academic records on their Workday Student account.
Step 4: Select OK
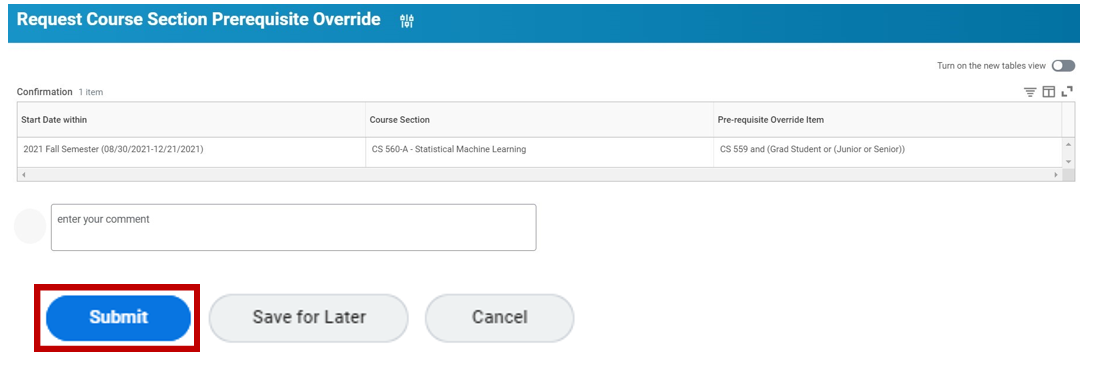
Step 5: Select Submit
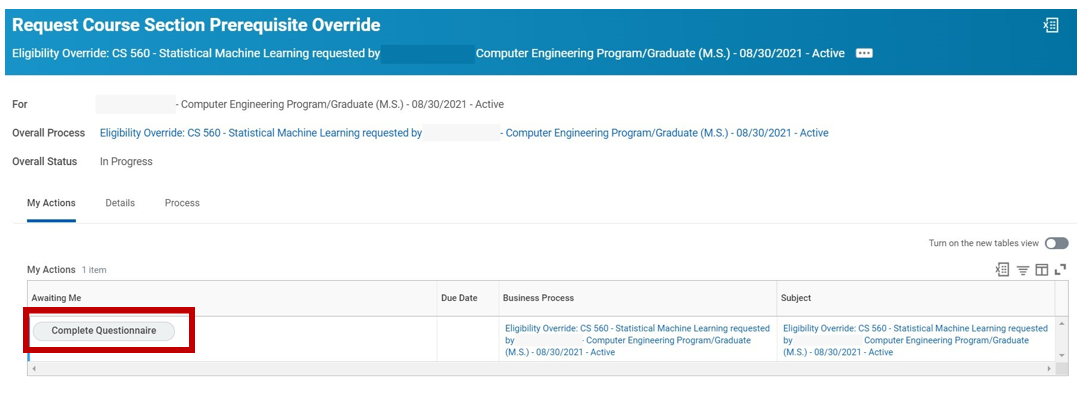
Step 6: Select Complete Questionnaire
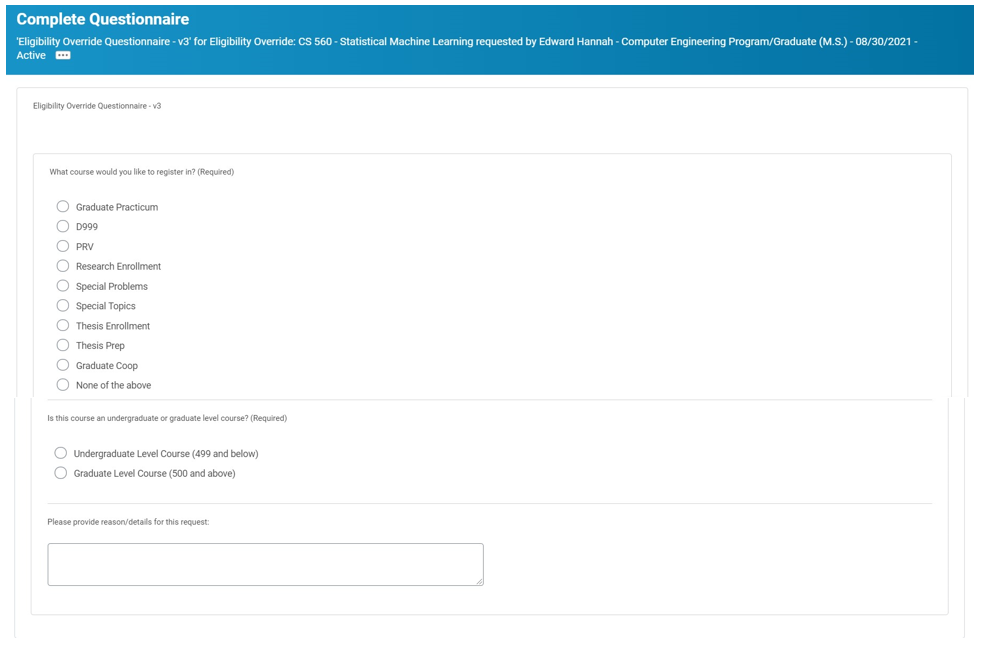
Step 7: Fill out required fields and provide any details necessary
Step 8: Select Submit

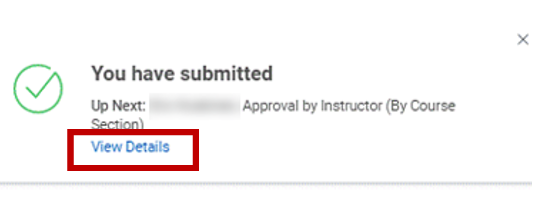
Step 9: Select View Details
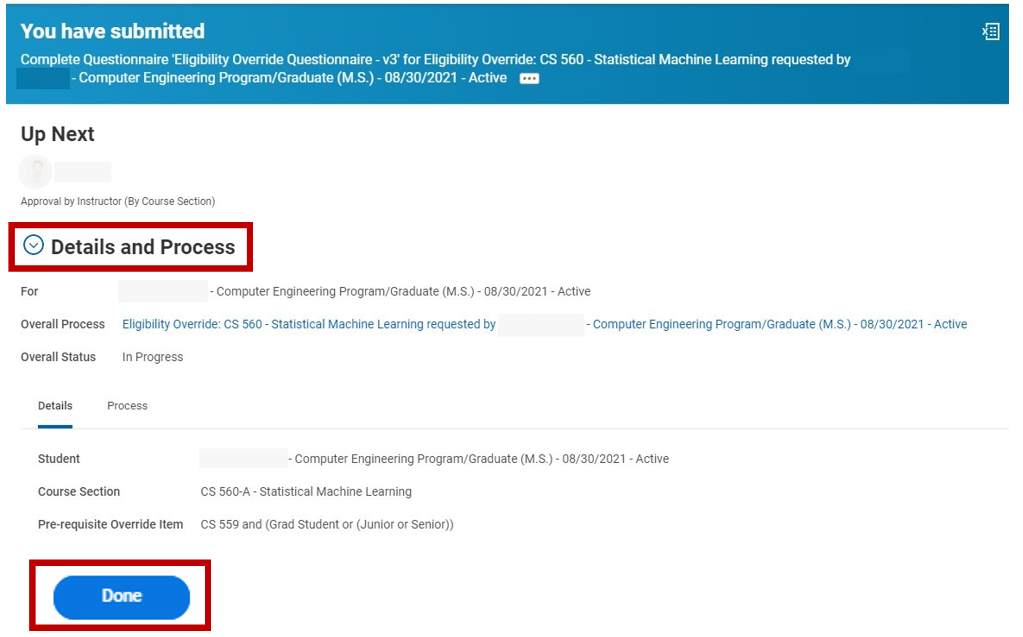
Step 10: Select the down arrow to expand Details and Process. Select Done.
Experiencing an issue or need additional support? Contact our OneIT Team by