How to Submit an Event Request for Coursedog Users
This guide details how Coursedog users can submit event requests directly through the Coursedog platform.
View a video demonstration ➤
Logging into Coursedog
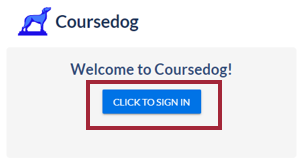
Select the Coursedog icon on the myStevens landing page.

On the following page, select the Click to Sign In button to access Coursedog.
Submitting an Event Request
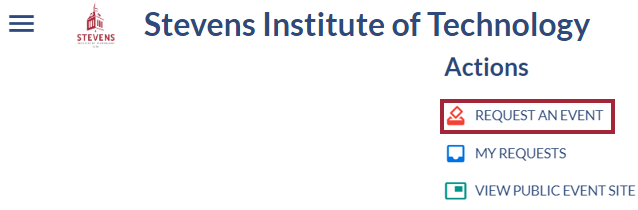
Step 1: On the Coursedog landing page, select Request an Event on the right side of the page under Actions.
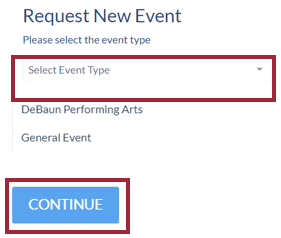
Step 2: On the following page, open the Request New Event dropdown menu and select the type of event you are requesting. Once you have made your choice, select Continue to move to the next step.
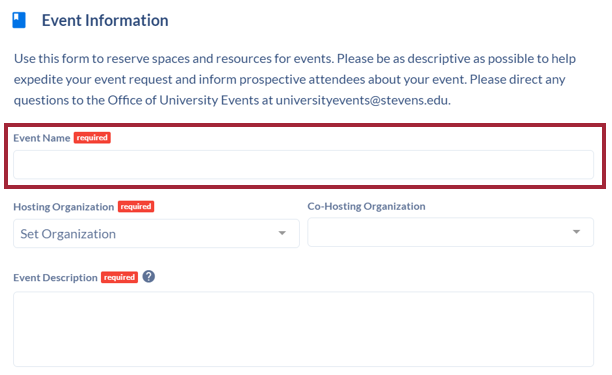
Event Information
Step 3: To submit an event request form, fill out all the information on the Event Information screen. Many of the fields are required and are marked as such.
The question “Should this event display on the internal campus events calendar?” defaults to No. Select Yes if you want the event to be displayed for any user on the internal events calendar. This allows any Stevens user to see the event listing.

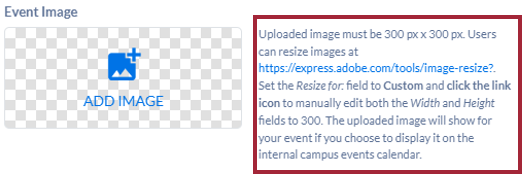
For Event images, the dimensions of the uploaded image must be 300px by 300px. Directions for a free resizing tool are provided next to the Event Image section.
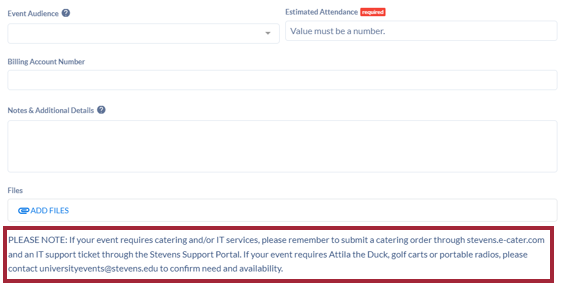
Please Note: IT and catering services are managed separately. Please submit an IT support ticket through the Stevens Support Portal, or a catering order through Stevens Dining Catering, if needed. (Reservation numbers are no longer needed for catering services.)
If your event requires Attila the Duck, golf carts or portable radios, contact universityevents@stevens.edu to confirm need and availability.
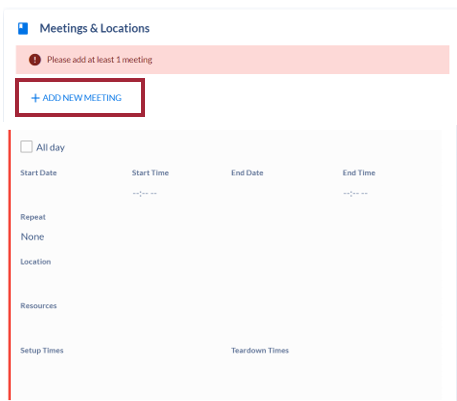
Meetings and Locations
Step 4: Under Meetings & Locations, select +Add New Meeting to enter meeting details.
Click anywhere within the Meeting box and the editable text fields will appear. Enter information for Start Date/Time and End Date/Time. Setup and Teardown Times default to one hour before and after the event time listed but can be altered for your needs.
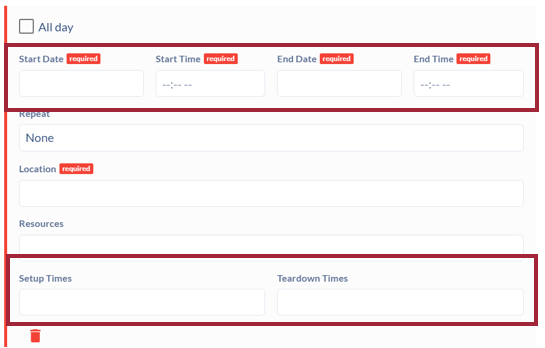
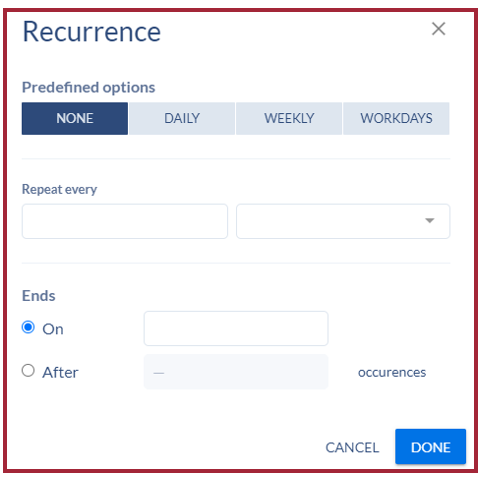
To make an event repeatable, click on the Repeat field.

In the Recurrence popup window, select from the predefined options or create a custom recurrence through the “Repeat every” dropdown menus. To set an end date for these recurring meetings, either select a specific end date or number of occurrences. Select Done.
Select Location to see a list of room options.

In the Location pop-up window, there are numerous ways to select a space. In the Search for rooms text field, you can type a specific location, filter your search by Type and Features, or browse through the list of available rooms.
For each location listed, the button on the right gives additional information about the room: Notes, Room Type, Room Capacity, Room Features, and Building.
If you have not yet chosen a location, choose the Select TBA option at the bottom of the Location menu.

Please note: For events in the Tech Flex Space in the University Center Complex (UCC), there are multiple entries to choose from. You can select UCC Tech Flex Space A (the back section of the space), UCC Tech Flex Space B (the middle section of the space), or UCC Tech Flex Space C (the front section of the space).
If you would like to request the entire auditorium, first create the meeting to select Space A, then duplicate the meeting twice to select Spaces B and C.
If there is a need to create an additional meeting time/location for this event, select +Add New Meeting. Select +Copy Existing Meeting, to copy the exact date and time for the original meeting. You can then change the information if a different time/location is needed.

Add Resources
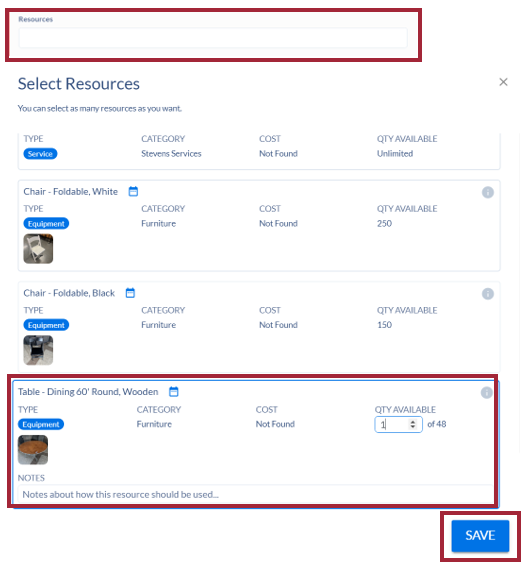
Step 5: Open the Resources text field to select resources to be provided for your event. For each resource you select, it displays the quantity of that resource available. If you click on that quantity, you are then able to specify how many of those resources are needed for the event.
Once you have chosen all needed resources, select Save to exit this screen.
Add Contacts
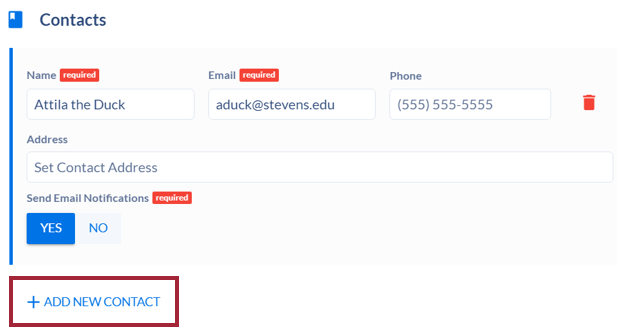
Step 6: In the Contacts section, enter the contact information for the Event Coordinator or edit the existing information. Select +Add New Contact to add contact information for additional coordinators.
Submit the Request
Step 7: Once all the event information is entered, select Submit Event Request.

View Request and Request Toolbox
Step 8: The following screen confirms that your event request has been submitted. You can select Return to Home to return to the Coursedog Events landing page or select View Request to see your event information.

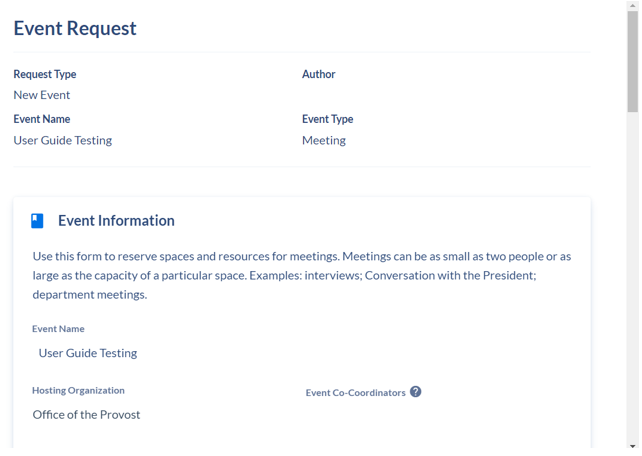
The View Request screen shows the Event Request information entered in the previous screen.
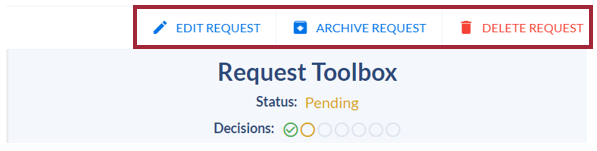
On the right side of the View Request screen, the Request Toolbox allows the user to edit, archive, or delete their request.
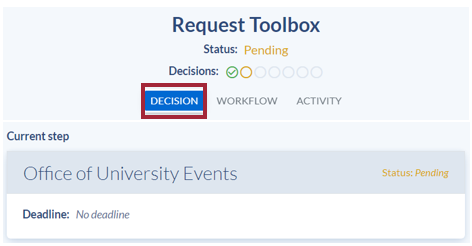
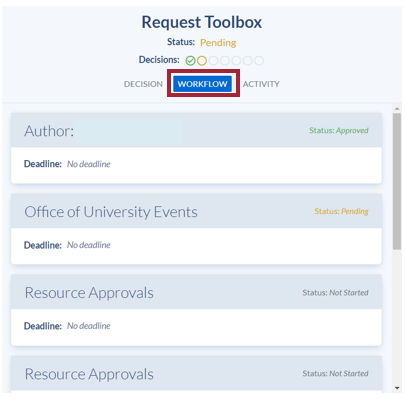
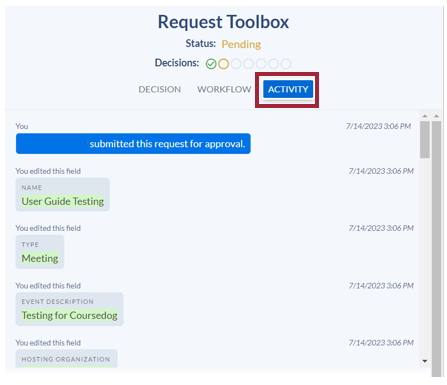
The Request Toolbox also has three tabs the user can access with useful information.
The Decision tab shows where the request is within the decision process.
The Workflow tab shows each step in the request process.
The Activity tab shows all edits and submissions made for this specific event request.
Please direct questions or issues to the Office of University Events at universityevents@stevens.edu.